
In this guide, you’ll learn how to edit registration forms.
Step 1 – Go to 'Settings → Members → Forms'
Here you’ll find several registration forms, such as:
Registration
Inscription
Webshopwizard
Coupon
Bookingwizard
App
Reservation
Each registration form can be customized individually.
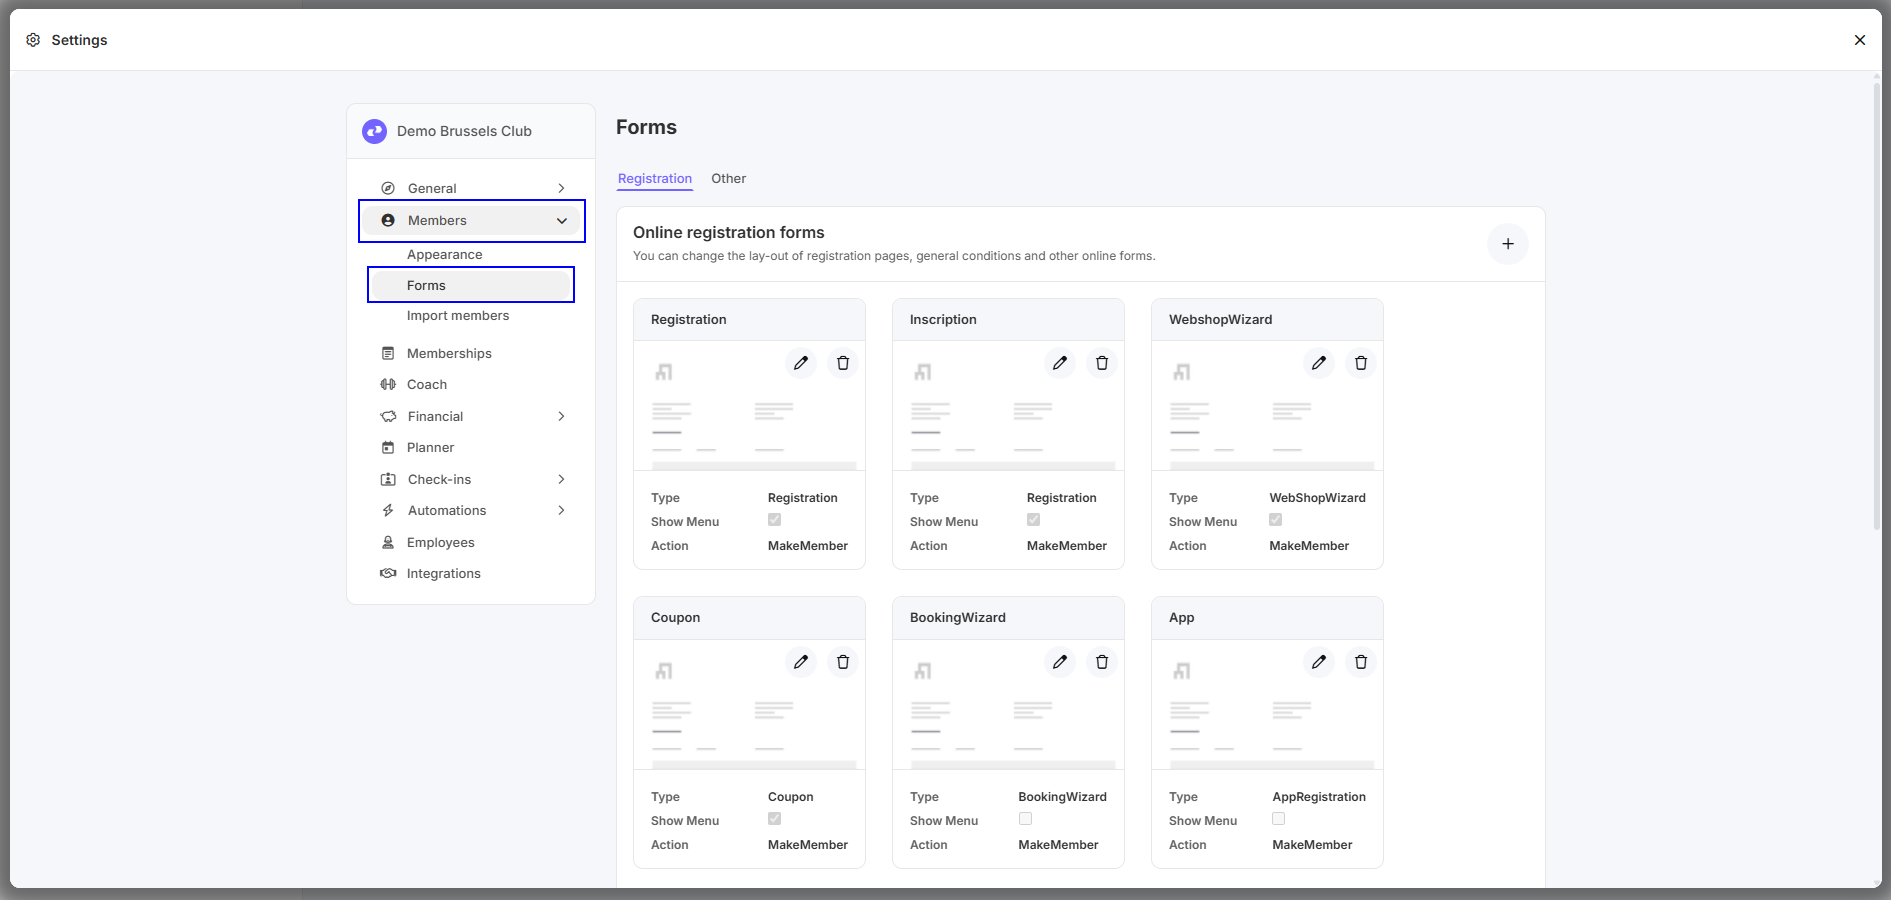
Step 2 – Open a registration form
1. Page Setup
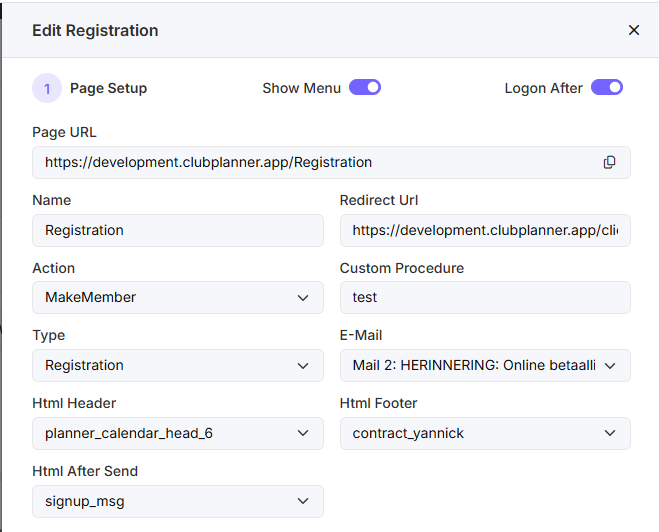
Show Menu: No longer applicable.
Logon After: Ensures that the customer is automatically logged into the online platform after registration.
Page URL: The link to the registration form.
Name: Allows you to change the name of the registration form.
Redirect URL: The customer will be redirected to this link after logging in, for example, to the webshop.
Action: When registering, you can create either a member record or a lead.
Custom Procedure: Used to trigger a custom program after registration — for example, to add a free trial session. You can contact support@clubplanner.be for assistance.
Type: Registration is used to create an account. Reservation allows a user to make a booking during registration.
E-mail: The email sent to the customer after registration.
HTML header: A text displayed at the top of the registration form. You can apply a template found under Settings → Members → Forms → Other.
HTML footer: Same as the HTML header, but for the footer section.
HTML after send: A template displayed after the registration is completed.
2. Customise Form
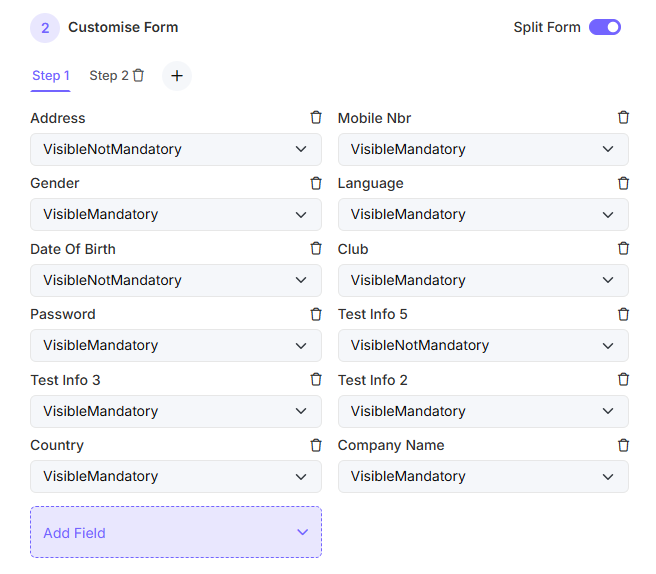
Split Form: Allows you to divide the registration form into multiple steps so that not everything appears on a single page.
For each field, you have three options:
VisibleMandatory: This field is required.
VisibleNotMandatory: This field is visible but optional.
VisibleMandatoryPassword: This field is required, and the entered characters are hidden. Recommended for the Password field.
To hide a specific field, click the trash can icon.