
In dieser Anleitung erfahren Sie mehr über die Anpassung von Anmeldungsformularen.
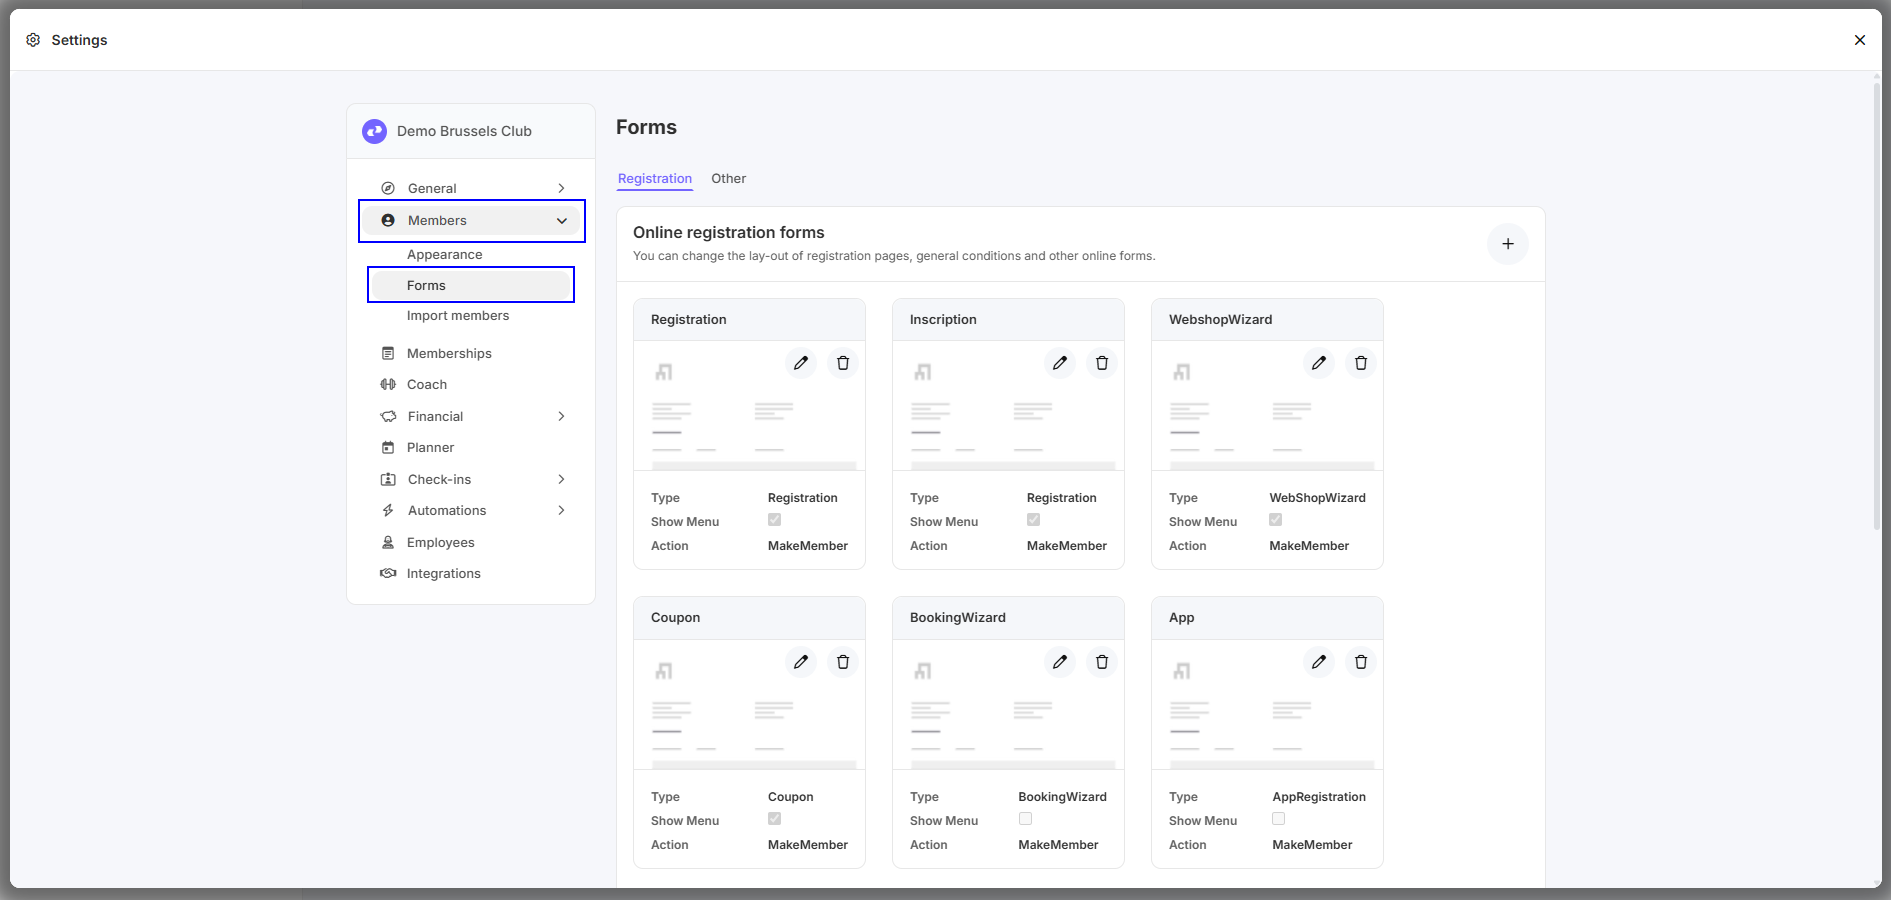
Schritt 1 – Gehen Sie zu „Einstellungen - Members - Forms"
Hier finden Sie verschiedene Anmeldungsformulare wie:
- Registration
- Inscription
- Webshopwizard
- Coupon
- Bookingwizard
- App
- Reservation
Sie können jedes Anmeldungsformular einzeln gestalten.
Schritt 2 – Öffnen Sie ein Anmeldungsformular
1. Page Setup
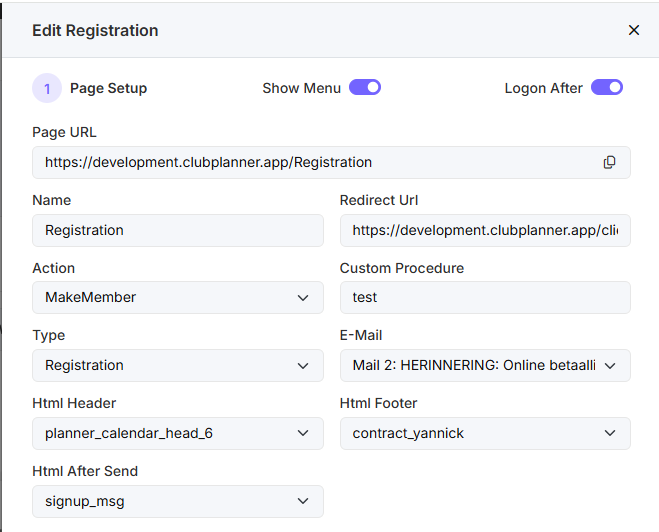
Show Menu: Nicht mehr anwendbar.
Logon After: Dies bewirkt, dass der Kunde nach der Registrierung direkt auf der Online-Plattform angemeldet wird.
Page URL: Dies ist der Link zum Anmeldungsformular.
Name: Hier können Sie den Namen des Anmeldungsformulars ändern.
Redirect URL: Der Kunde wird nach dem Anmelden zu diesem Link weitergeleitet, beispielsweise zum Webshop.
Action: Bei der Registrierung können Sie eine Mitgliederkartei oder einen Prospect erstellen.
Custom Procedure: Dies wird verwendet, um eine benutzerdefinierte Programmierung nach der Registrierung auszuführen, beispielsweise um einen kostenlosen Probetemin hinzuzufügen. Hierzu können Sie sich an support@clubplanner.be wenden.
Type: Registration dient zum Erstellen eines Kontos. Reservation dient dazu, bei der Registrierung direkt auch eine Reservierung zu erstellen.
E-mail: Die E-Mail, die nach der Registrierung an den Kunden versendet wird.
HTML header: Ein Text, den Sie oben im Anmeldungsformular anzeigen möchten. Hier können Sie eine Vorlage einrichten, die Sie unter Einstellungen → Members → Forms → Other finden.
HTML footer: Wie HTML header, aber für die Fußzeile.
HTML after send: Eine Vorlage, die nach der Registrierung angezeigt wird.
2. Customise Form
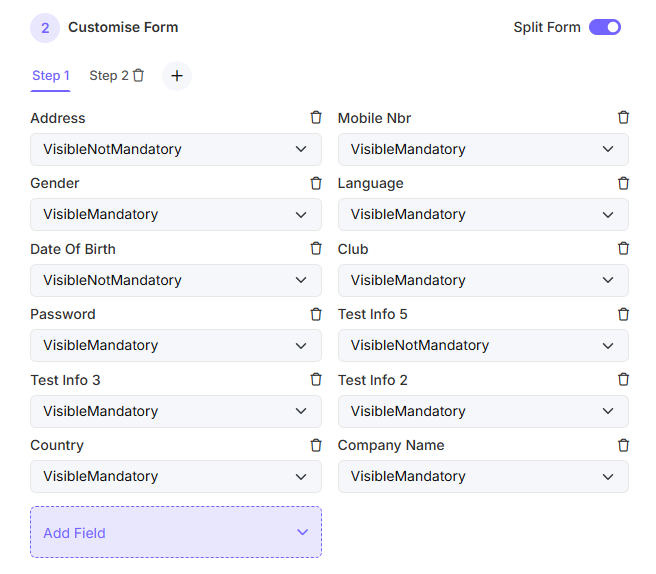
Split Form: Hiermit können Sie das Anmeldungsformular in verschiedene Schritte aufteilen, sodass nicht alles untereinander angezeigt wird.
Für jedes Feld haben Sie drei Optionen:
VisibleMandatory: Dieses Feld ist erforderlich.
VisibleNotMandatory: Dieses Feld ist sichtbar, aber nicht erforderlich.
VisibleMandatoryPassword: Dieses Feld ist erforderlich, und die eingegebenen Zeichen sind unleserlich. Dies wird für das Feld „Passwort" empfohlen.
Wenn Sie ein bestimmtes Feld nicht anzeigen möchten, klicken Sie auf das Papierkorbsymbol.