
In dieser Anleitung lernst du, wie du in Club Planner einen neuen Aktivitätstyp hinzufügst.
Aktivitätstypen helfen bei der Organisation von Kursen, Trainingseinheiten oder anderen Clubaktivitäten.
📝 Schritt-für-Schritt-Anleitung
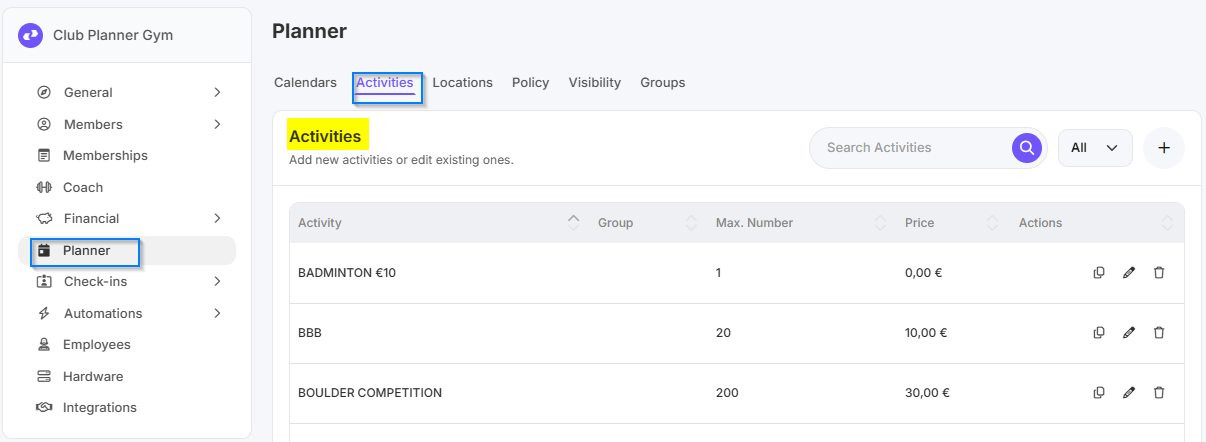
Schritt 1 – Navigiere zu "Settings"→"Planner"→"Activities"
- Navigiere im Hauptmenü zu "Settings".
- Klicke dann auf "Planner"→"Activities", um vorhandene Aktivitätstypen zu verwalten.
Schritt 2 – Klicke auf "Add Activity Type"
- Klicke auf die Schaltfläche "Add Activity Type", um einen neuen Typ zu erstellen.
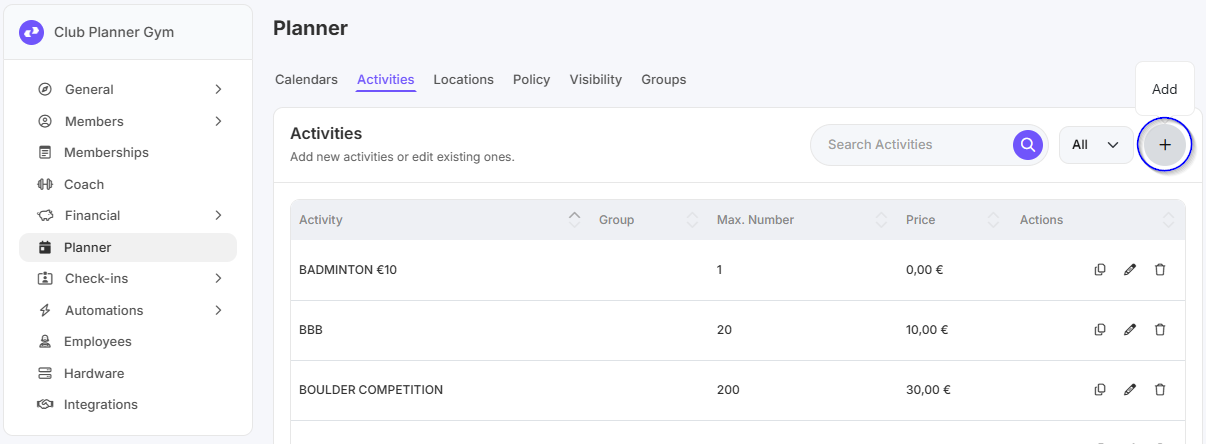
Wenn du den Buchungs-Assistenten nutzen möchtest, findest du weitere Informationen in dieser Anleitung.
Schritt 3 – Alle Aktivitätsdaten eingeben
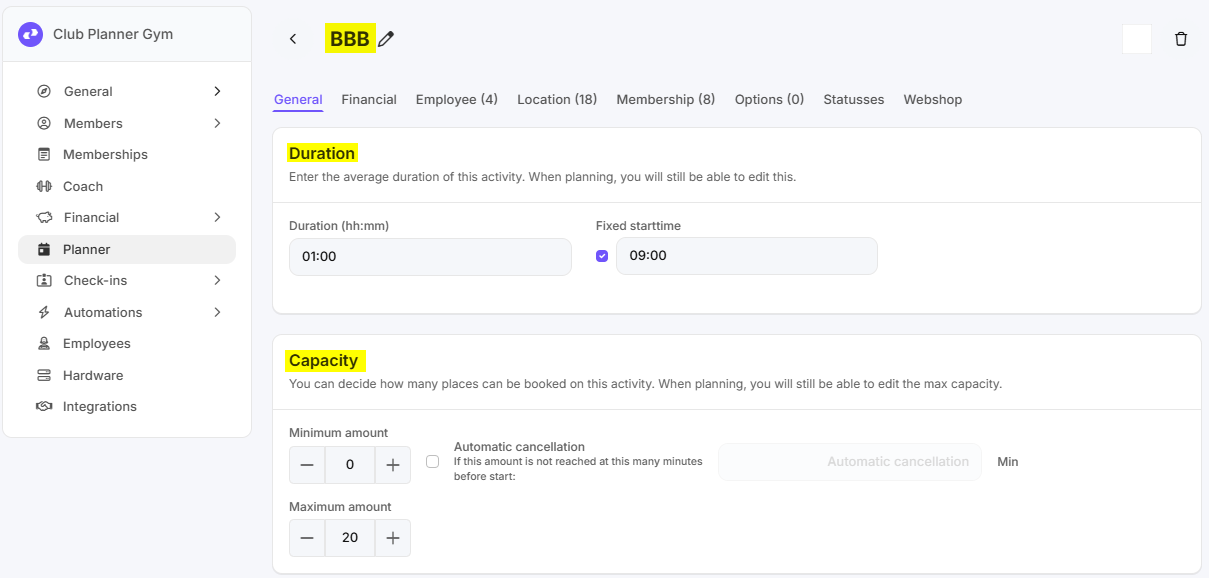
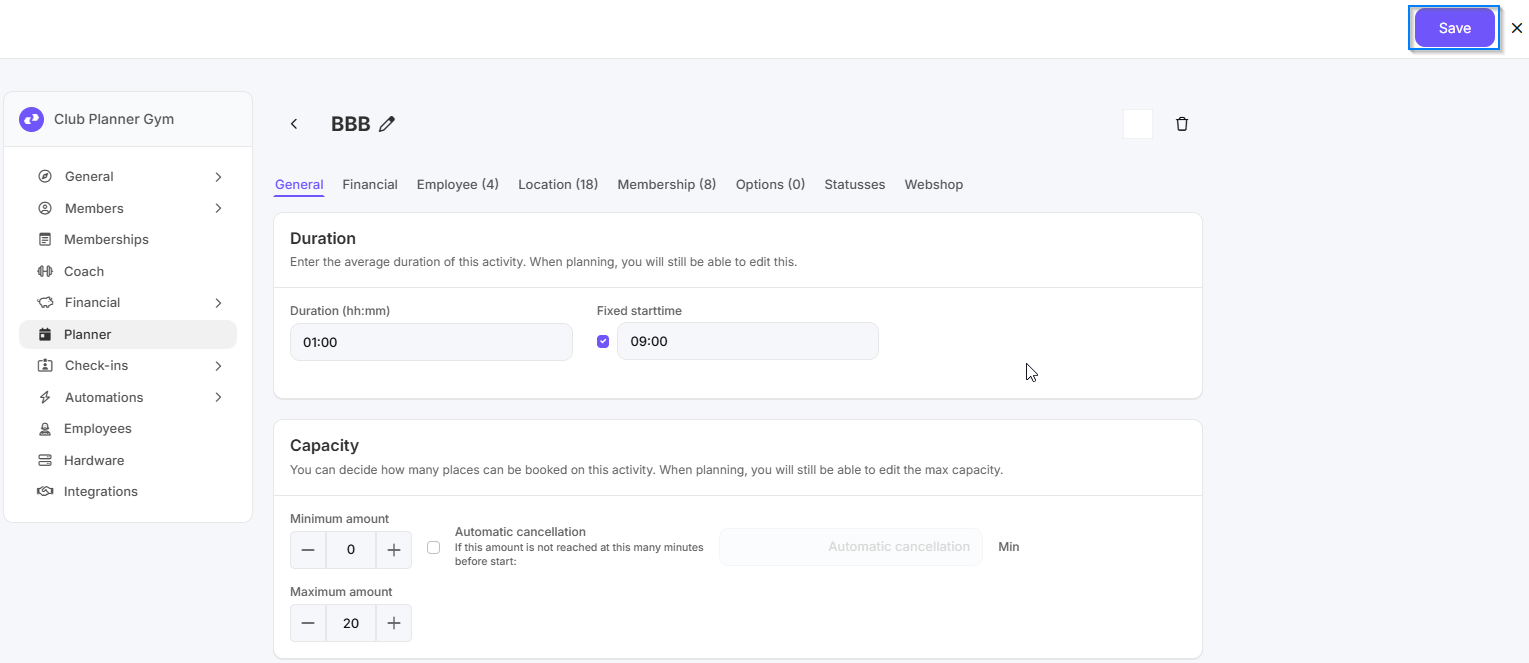
- Geben Sie die folgenden Daten im Reiter Allgemein ein:
- Name der Aktivität (z. B. Yoga, Spinning, HIIT)
- Beschreibung (optional)
- Farbcode oder Symbol (optional, hilft bei visueller Übersicht)
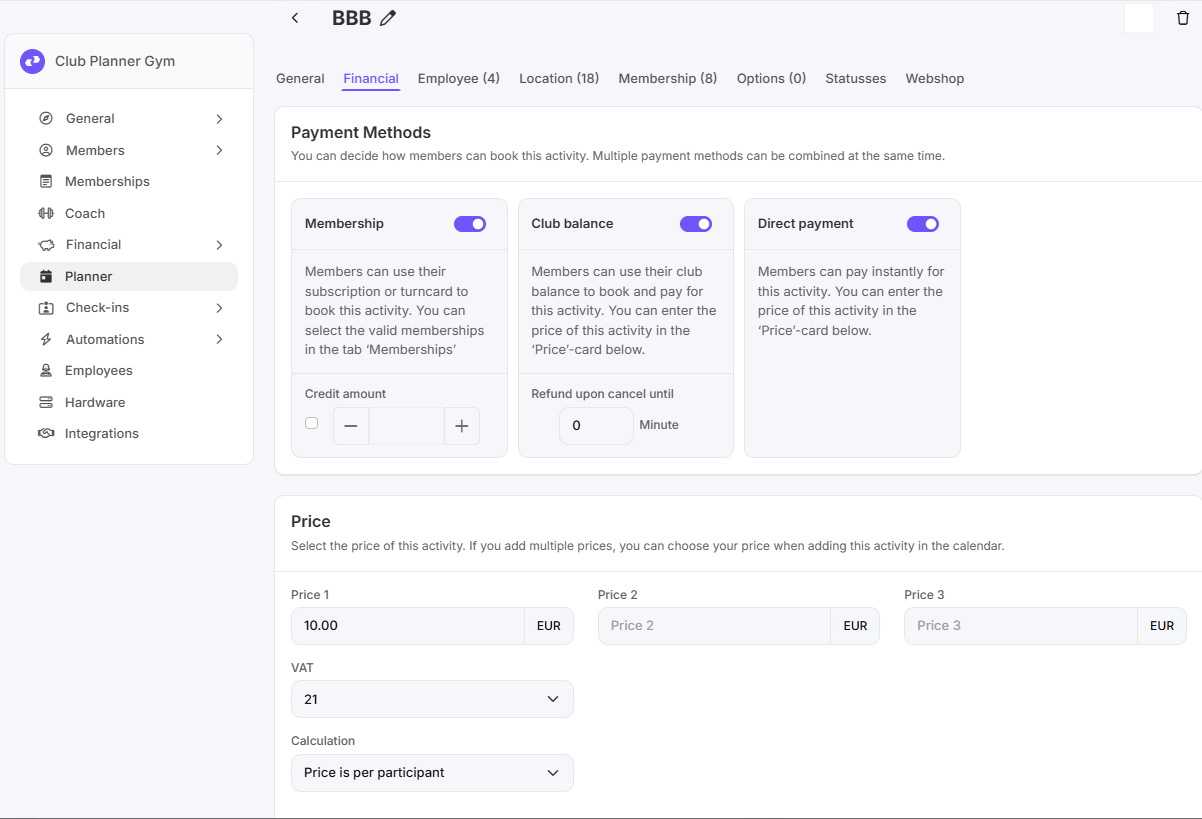
- Füllen Sie die folgenden Daten im Reiter Finanziell:
-
Zahlungsart:
1. Mitgliedschaft: Mitglieder können mit ihrem Abonnement oder ihrer Wertkarte bezahlen.
2. Clubguthaben: Mitglieder können mit ihrem Clubguthaben bezahlen.
3. Direktzahlung: Mitglieder zahlen direkt für die Aktivität. - Preis: Hier können Sie eintragen, wie viel die Aktivität kostet. Dies muss für Mitglieder festgelegt werden, die mit Clubguthaben oder Direktzahlung bezahlen.
-
Zahlungsart:
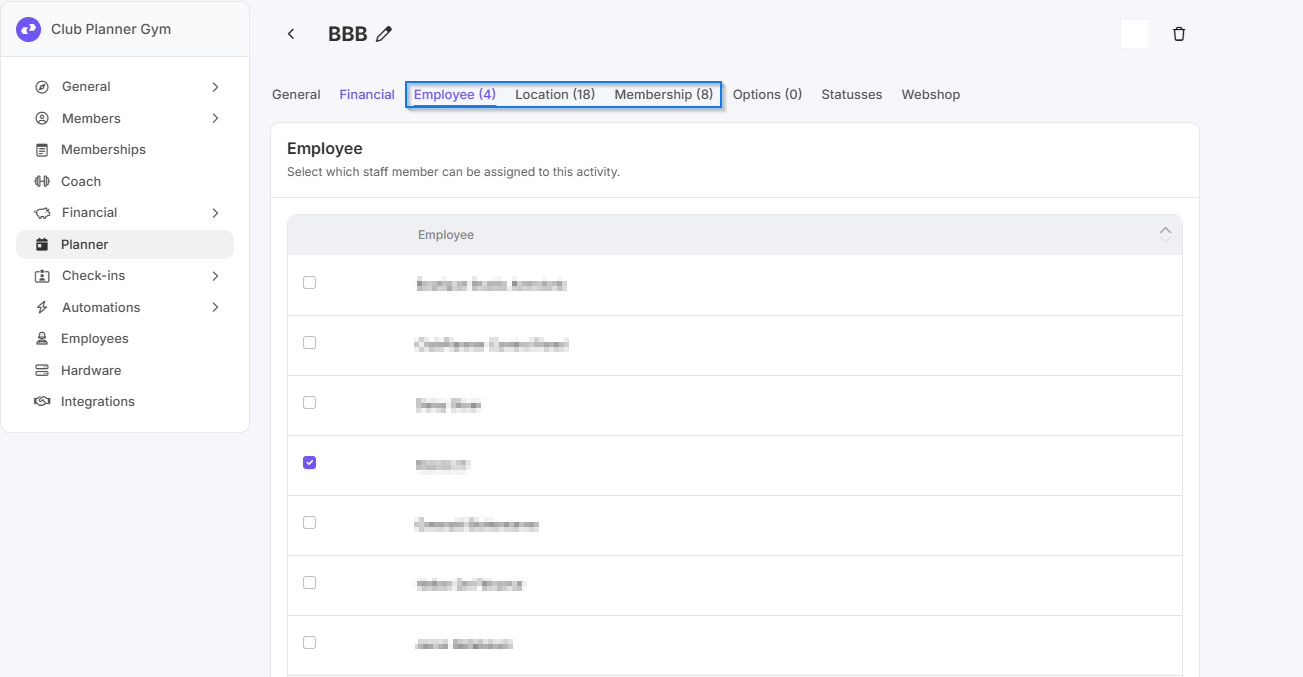
- Reiter „Mitarbeiter": Markieren Sie, welche Mitarbeiter dieser Aktivität zugewiesen werden können.
- Reiter „Standort": Markieren Sie, an welchen Standorten diese Aktivität geplant werden kann.
- Reiter „Mitgliedschaften": Markieren Sie, welche Mitgliedschaften diese Aktivität reservieren dürfen.
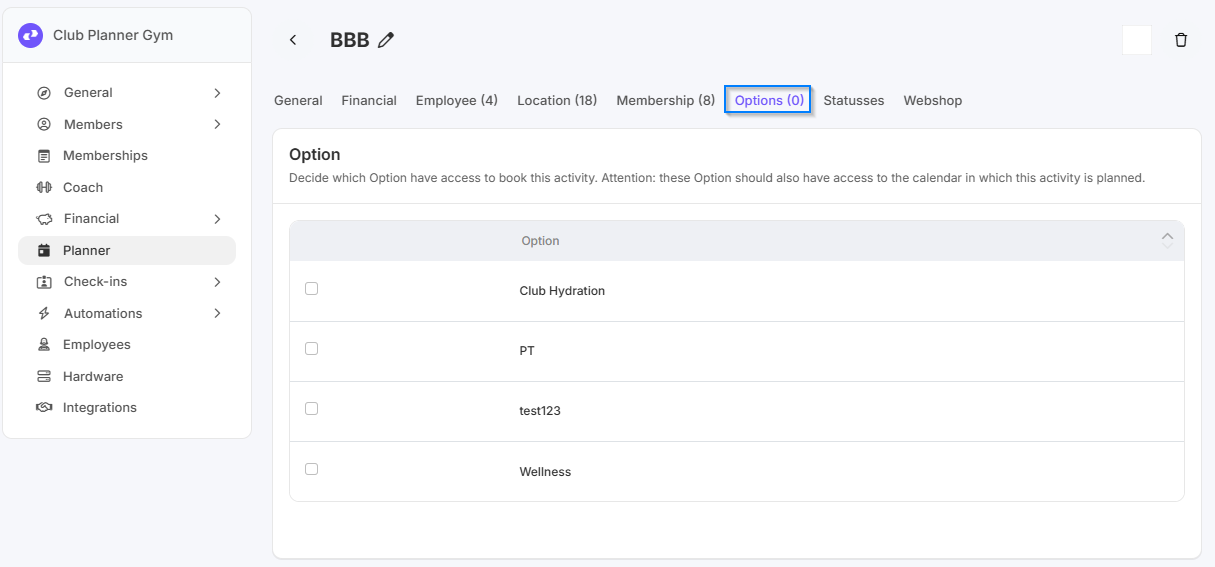
- Im Reiter „Optionen" können Sie einstellen, welche Optionen Zugriff haben, um diese Aktivität zu reservieren.
Hinweis: Diese Option muss Zugriff auf den Kalender haben, in dem die Aktivität geplant wird.
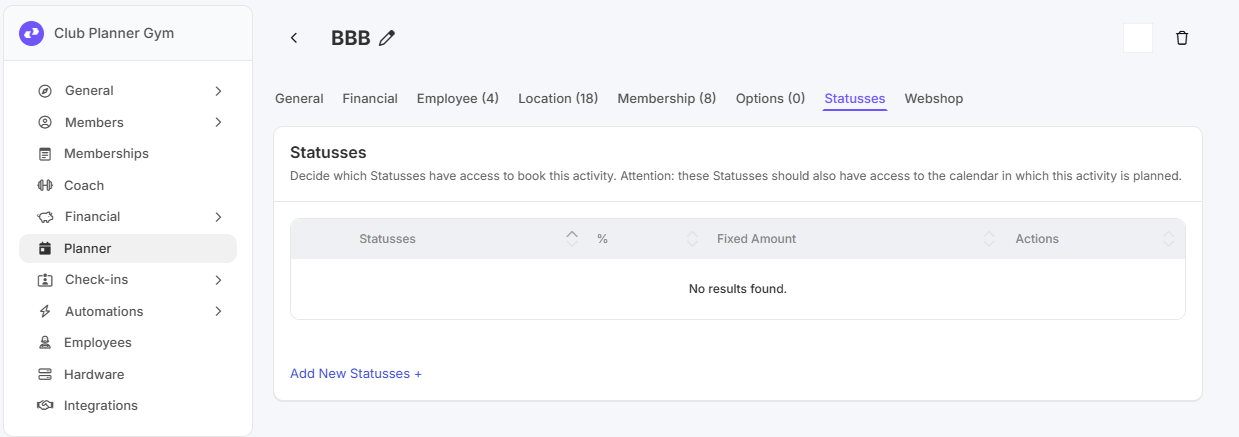
- Im Reiter „Status" können Sie einstellen, welche Status Zugriff haben, um diese Aktivität zu reservieren.
Hinweis: Dieser Status muss Zugriff auf den Kalender haben, in dem die Aktivität geplant wird.
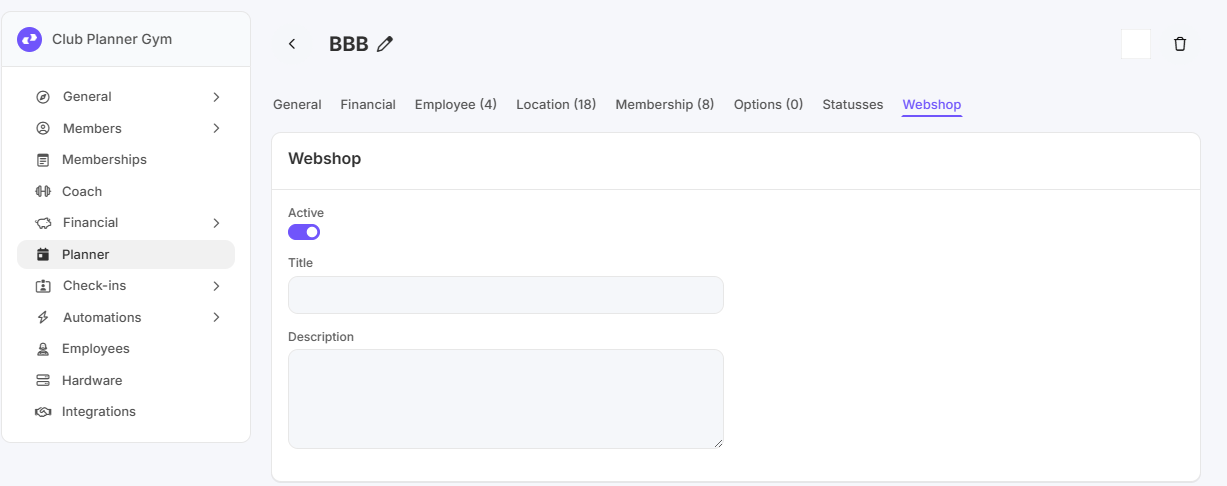
- Im Reiter „Webshop" können Sie angeben, ob diese Aktivität aktiv ist oder nicht. Schalten Sie diese auf aktiv, wenn Sie die Aktivität in einem Buchungs- oder Slot-Assistenten anzeigen möchten.
Schritt 4 – Speichern
- Klicke auf "Save", um den neuen Aktivitätstyp zu erstellen.
- Der Aktivitätstyp erscheint nun in der Liste der verfügbaren Aktivitäten.
Schritt 5 – Überprüfung
- Überprüfen Sie, ob der neue Aktivitätstyp beim Hinzufügen von Kursen oder anderen Aktivitäten korrekt angezeigt wird.
- Es kann nun zur Planung von Gruppenkursen oder einzelnen Aktivitäten verwendet werden.