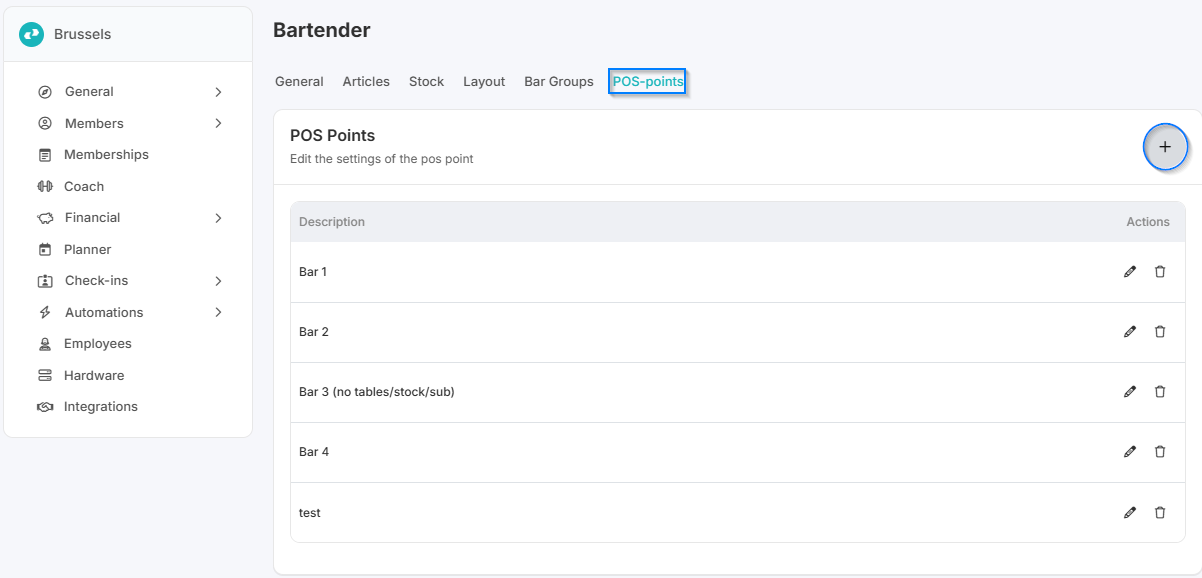
In dieser Anleitung lernst du, wie du in Club Planner die Club BarTender-Einstellungen konfigurierst.
Dies betrifft die Einstellungen für den Verkauf von Getränken, Snacks und anderen Artikeln über das Club BarTender-Modul.
📝Schritt-für-Schritt-Anleitung
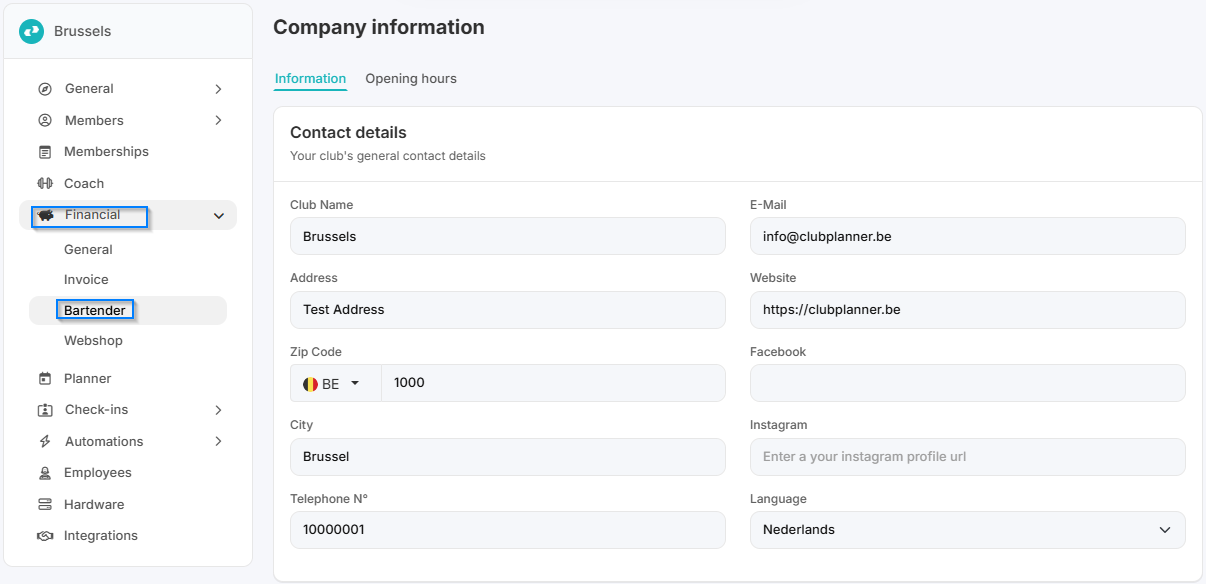
Schritt 1 – Gehe zu „Settings" → „Finanziell - Club BarTender"
- Navigiere im Hauptmenü zu „Settings - Finanziell".
- Klicke dann auf „Club BarTender", um die Konfiguration zu öffnen.
Schritt 2 – Allgemeine Einstellungen
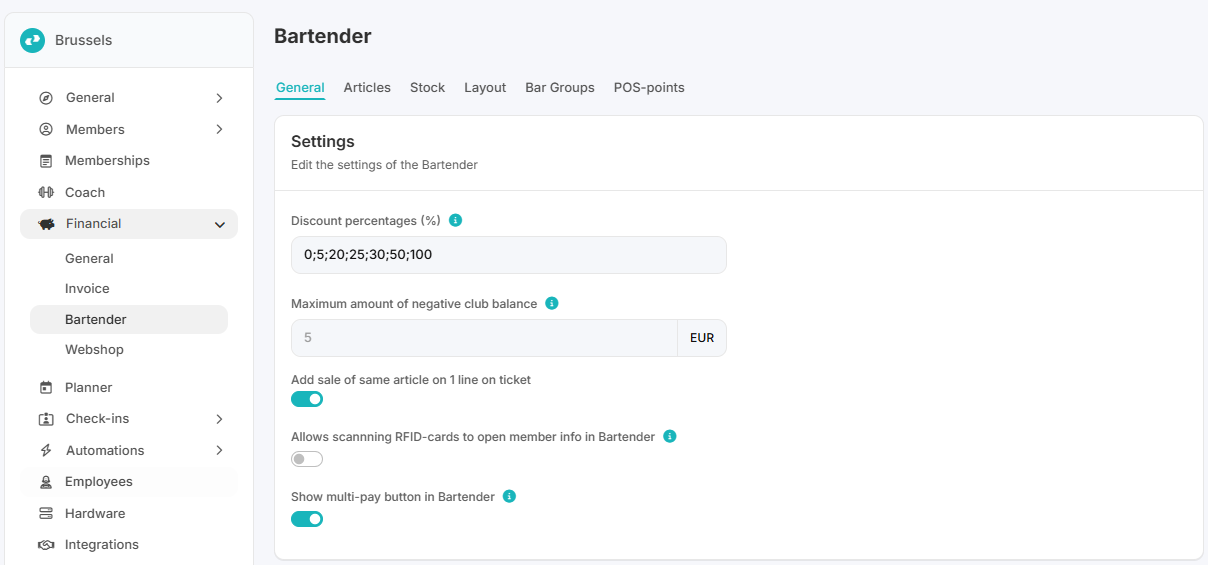
- Füge neue Rabatte hinzu
- Wähle das minimale negative Clubguthaben (wie weit dürfen Mitglieder unter 0 gehen)
- Wähle, ob alle Artikel auf einem Bon gedruckt werden, ob gescannte Mitgliedskarten das Mitglied öffnen, und ob du die Mehrfach-Zahlung-Schaltfläche im Club BarTender anzeigen möchtest
Schritt 3 – Artikel hinzufügen oder bearbeiten
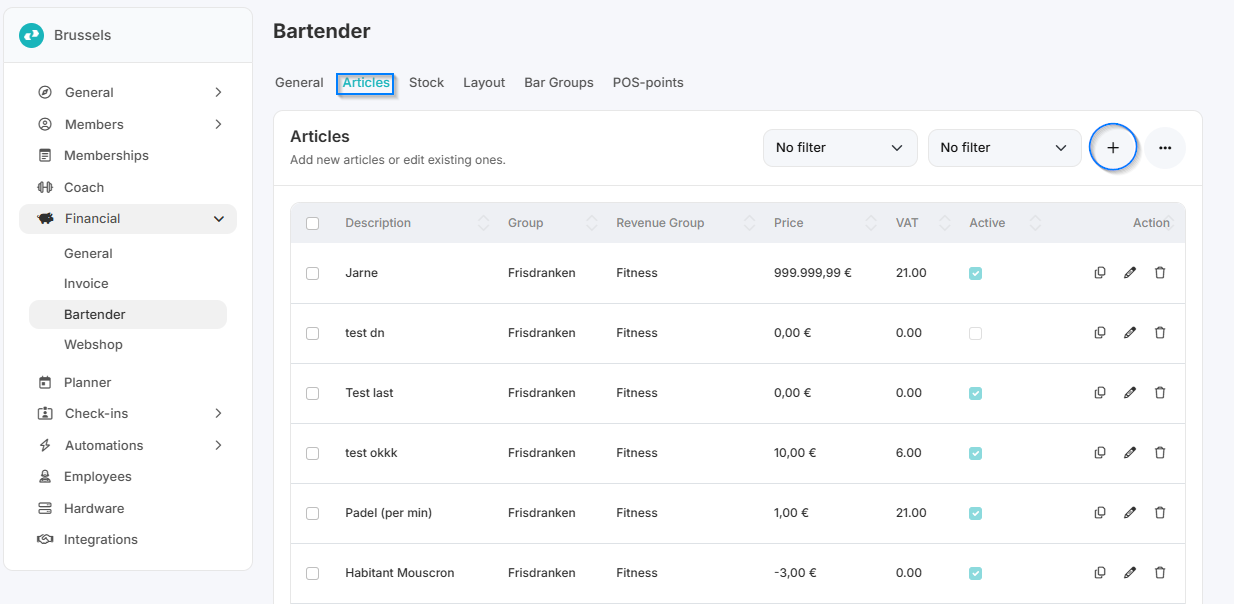
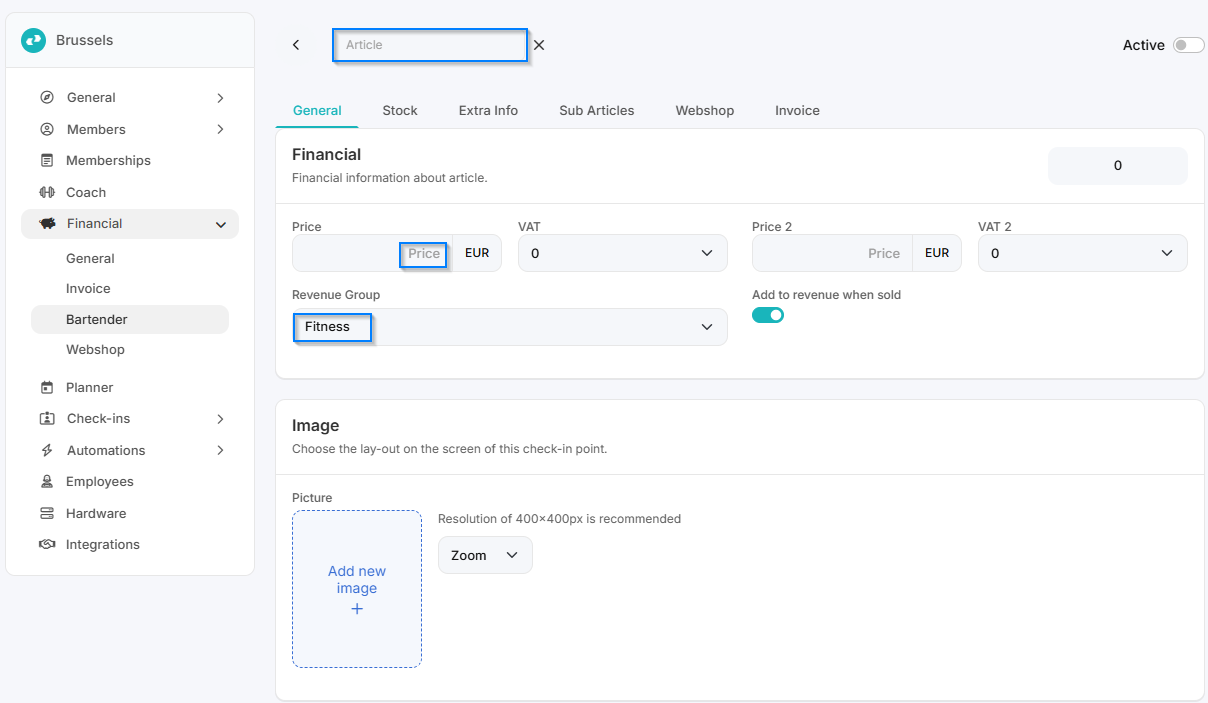
- Klicke auf „Add Product", um einen neuen Artikel hinzuzufügen.
- Gib Details ein wie:
- Name
- Preis
- Kategorie
- Verfügbarkeit
Schritt 4 – Layout
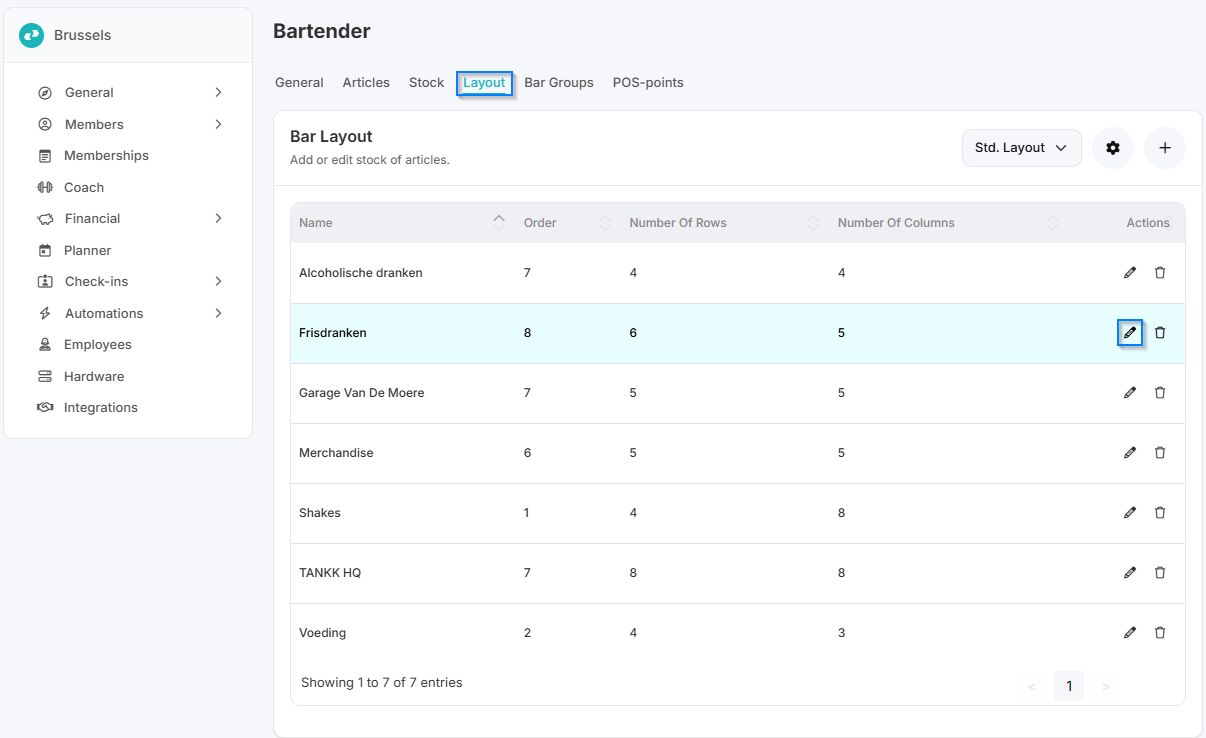
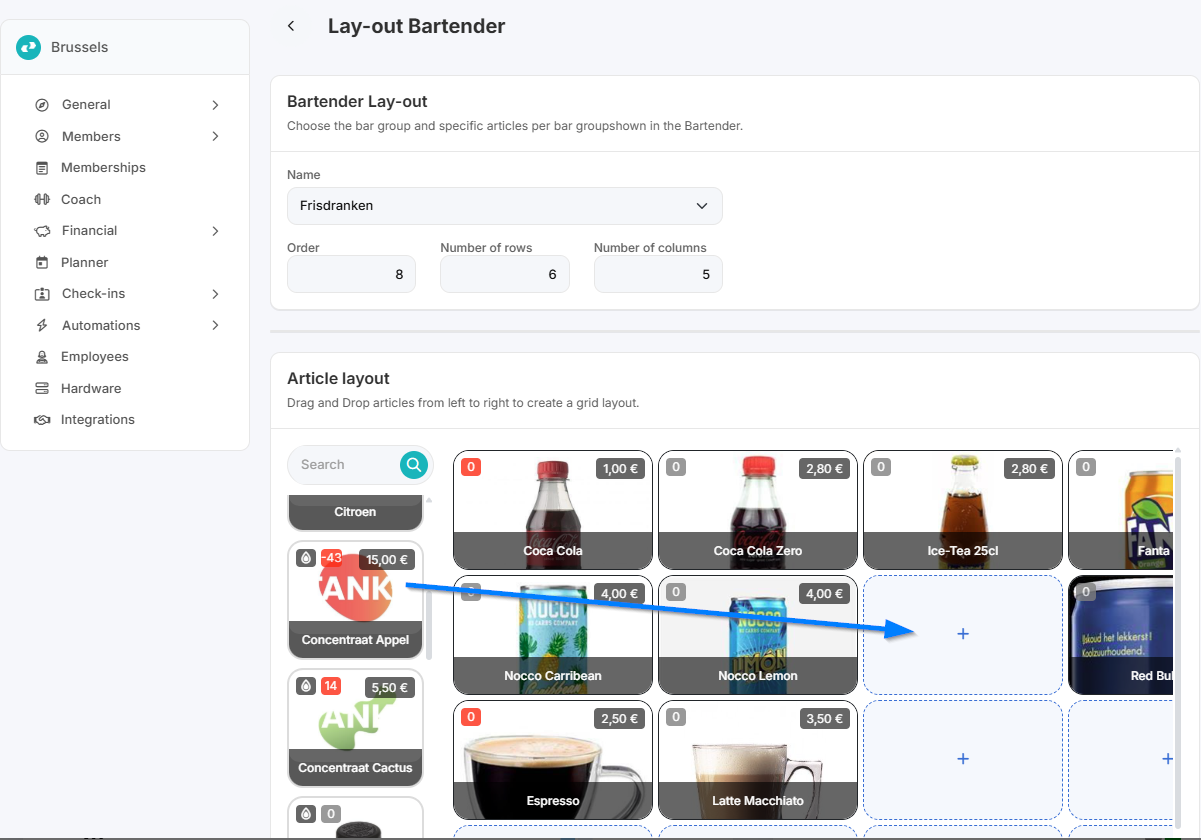
- Jetzt, da du die Artikel hinzugefügt hast, kannst du sie noch im Layout hinzufügen.
- Dies bestimmt, wie Transaktionen beim Club BarTender verarbeitet werden.
Schritt 5 – Bar-Gruppen
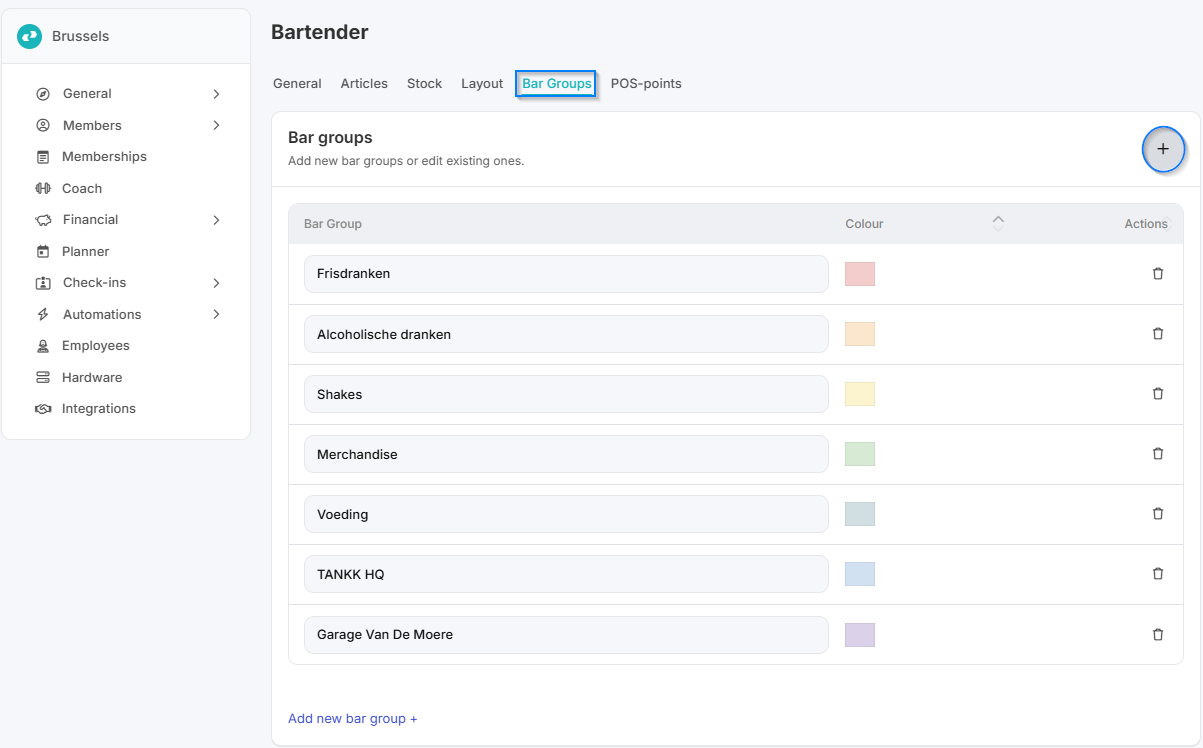
- Erstelle verschiedene Bar-Gruppen für einen klaren Überblick im Club BarTender.
Schritt 6 - POS-Punkte
- Du kannst verschiedene Layouts / POS-Punkte für mehrere Kassenpunkte mit unterschiedlichem Layout oder anderen Artikeln aktivieren.