
Dieser Artikel erläutert, wie Sie in Club Planner ein Abonnement für ein berufliches (Unternehmens-)Profil erstellen und wie alle Mitarbeiter desselben Unternehmens diese Mitgliedschaft nutzen können.
Unternehmensprofile erstellen
Der erste Schritt besteht darin, ein Unternehmensprofile mit den Unternehmensdaten zu erstellen. Dies ist das Hauptkonto (Parent), auf dem das Abonnement erworben und in Rechnung gestellt wird. Stellen Sie sicher, dass alle Unternehmensdaten ausgefüllt sind.
- Fügen Sie ein neues Mitglied hinzu (Name und Vorname können in diesem Fall der Name des Unternehmens sein)
- Fügen Sie alle Finanz- und Unternehmensdaten hinzu
- Verkaufen Sie eine Mitgliedschaft auf diesem Profil
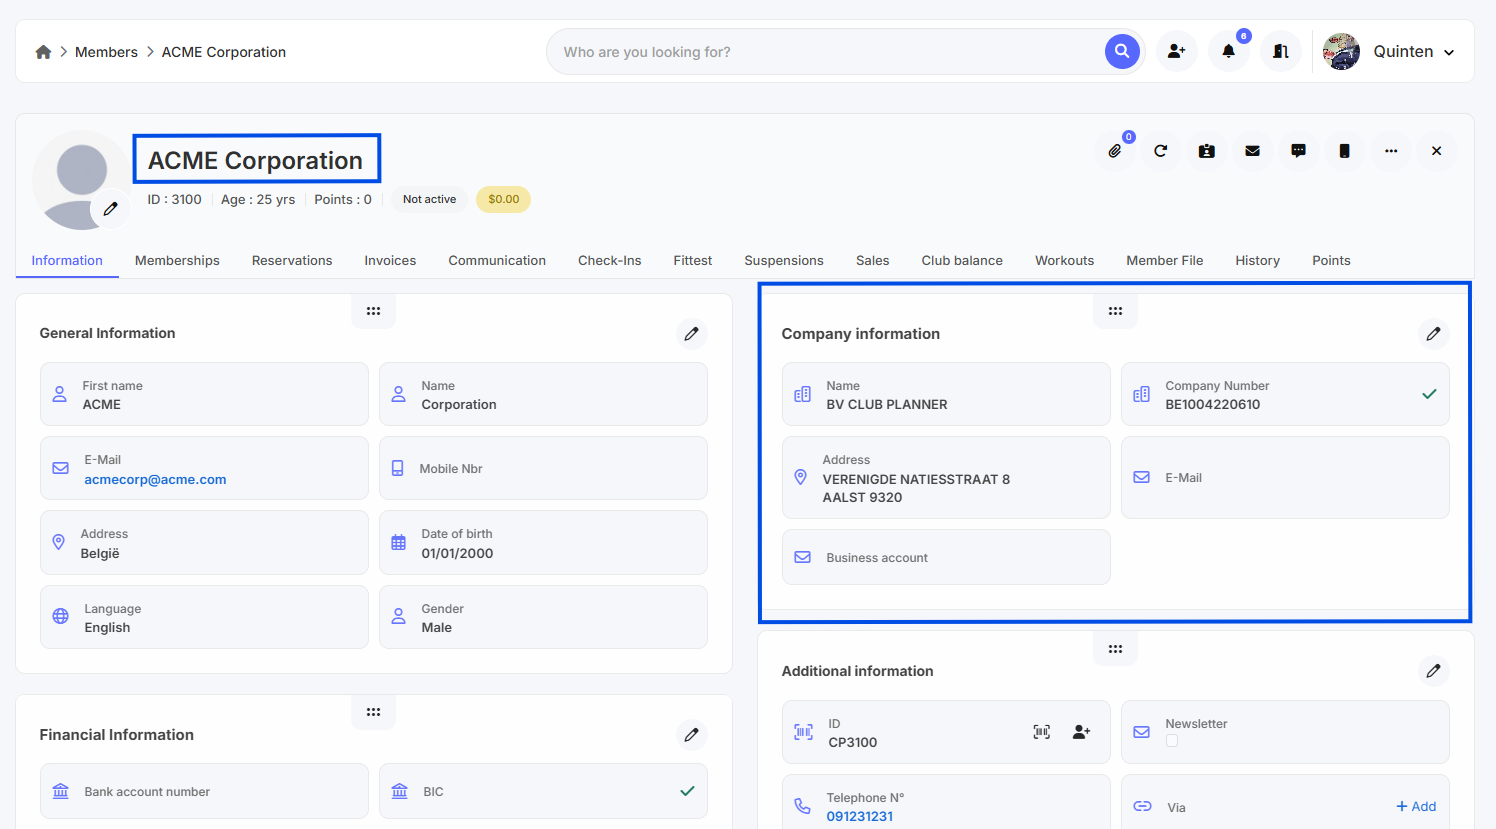
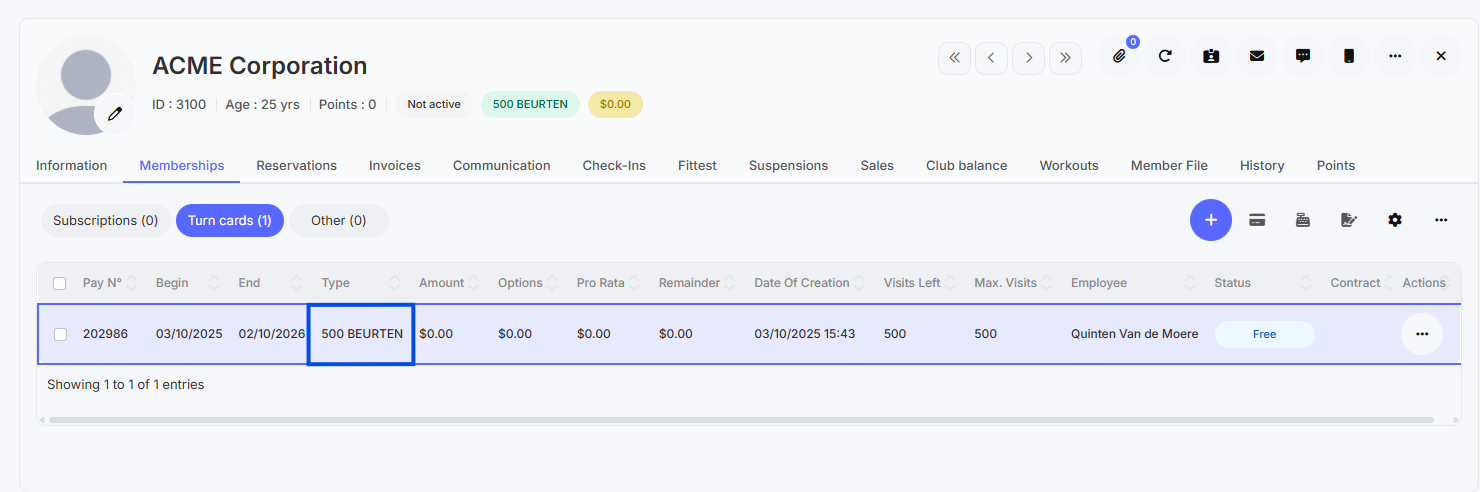
- Das Unternehmensprofile wurde erstellt (ID: 3100) im obigen Beispiel.
Mitarbeiter mit Unternehmensprofile (Parent) verbinden
Jetzt können Sie alle Mitarbeiter in Club Planner erstellen (oder per Excel importieren). Sie müssen jetzt jedes Mitgliederprofil mit dem Unternehmensprofile (ID 3100) verbinden.
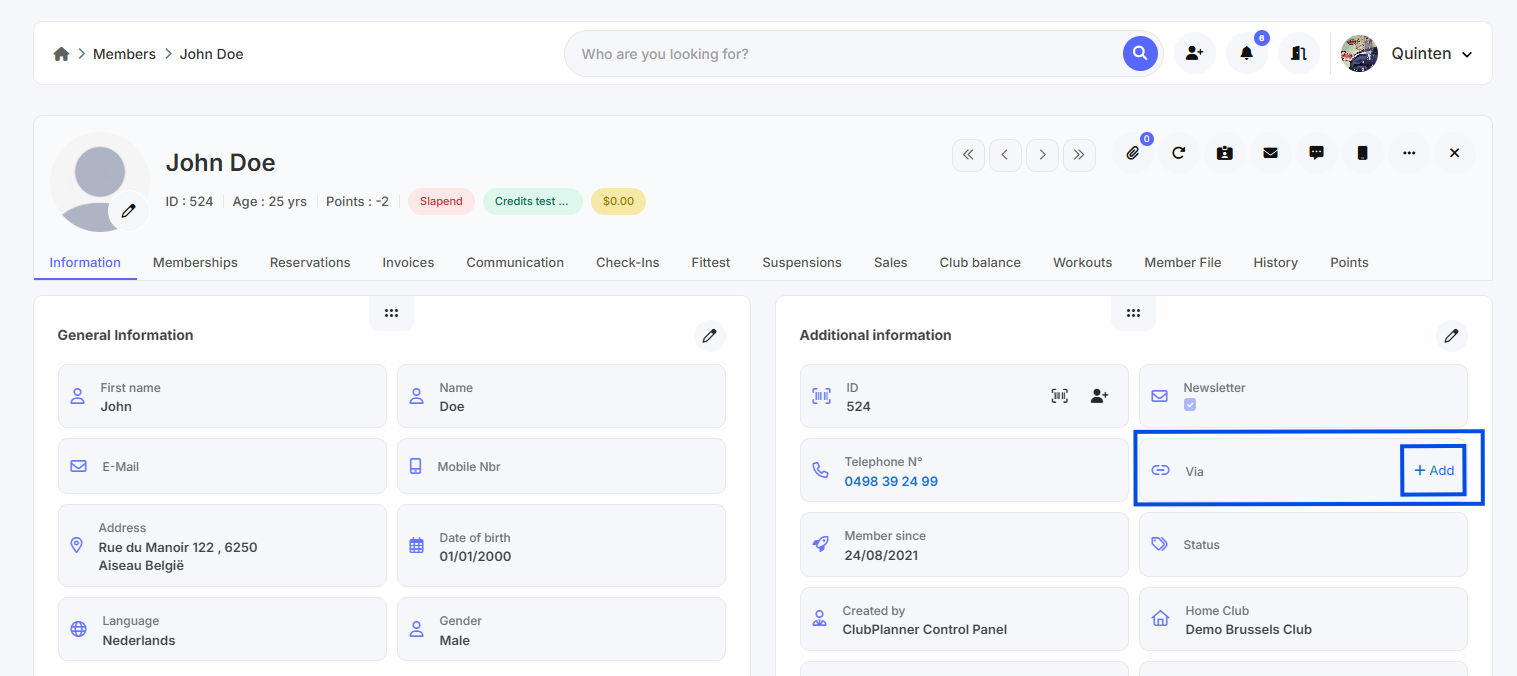
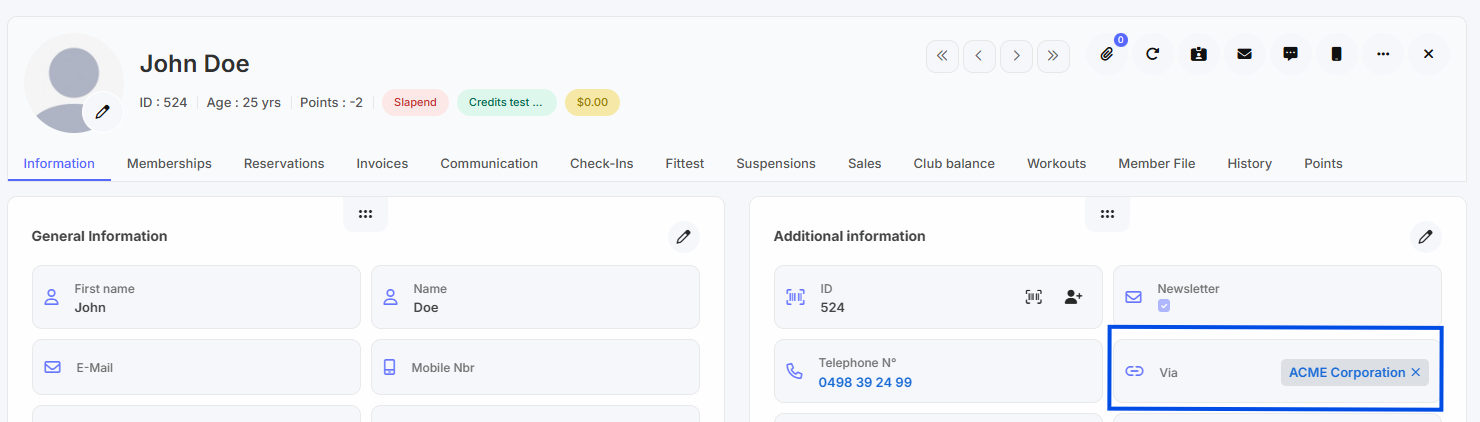
- Öffnen Sie das Profil des Mitarbeiters, z. B. John Doe
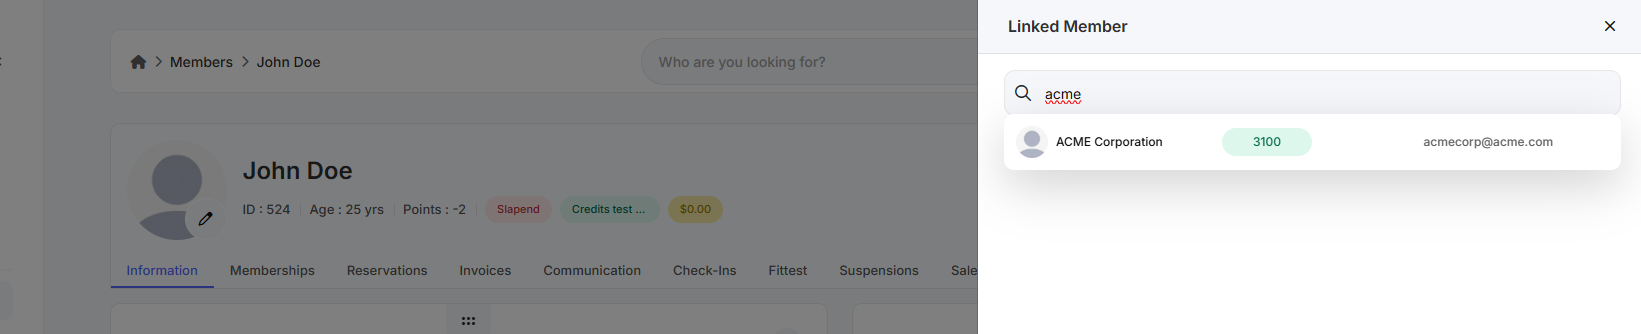
- Klicken Sie im Feld Via auf die Schaltfläche Add und suchen Sie das Unternehmensprofile auf (ACME Corp - ID: 3100).
- Dieser Mitarbeiter (John Doe) ist jetzt mit dem Unternehmensprofile (ACME Corp) verbunden. Dies bedeutet, dass der Mitarbeiter die Mitgliedschaft des Unternehmensprofiles nutzen kann.
- Tun Sie dies für alle Mitarbeiter des Unternehmens
Achtung: Falls der Mitarbeiter selbst ein Abonnement auf seinem Profil hat, wird Club Planner trotzdem das Abonnement des Unternehmens nutzen. Falls Sie möchten, dass der Mitarbeiter sein eigenes Abonnement nutzt, müssen Sie den Mitarbeiter vom Unternehmensprofile trennen.