
In diesem Artikel erklären wir dir Schritt für Schritt, wie du einen neuen Standort hinzufügst und dafür sorgst, dass dieser korrekt in deinem Kalender verwendet werden kann.
Der Prozess besteht aus 3 Teilen:
1. Den Standort erstellen
2. Den Standort mit dem richtigen Kalender verknüpfen
3. Überprüfen, ob Aktivitäten Zugang zum Standort haben
1. Einen neuen Standort erstellen
Bevor du einen Standort im Kalender verwenden kannst, muss dieser zuerst erstellt werden.
Anleitung
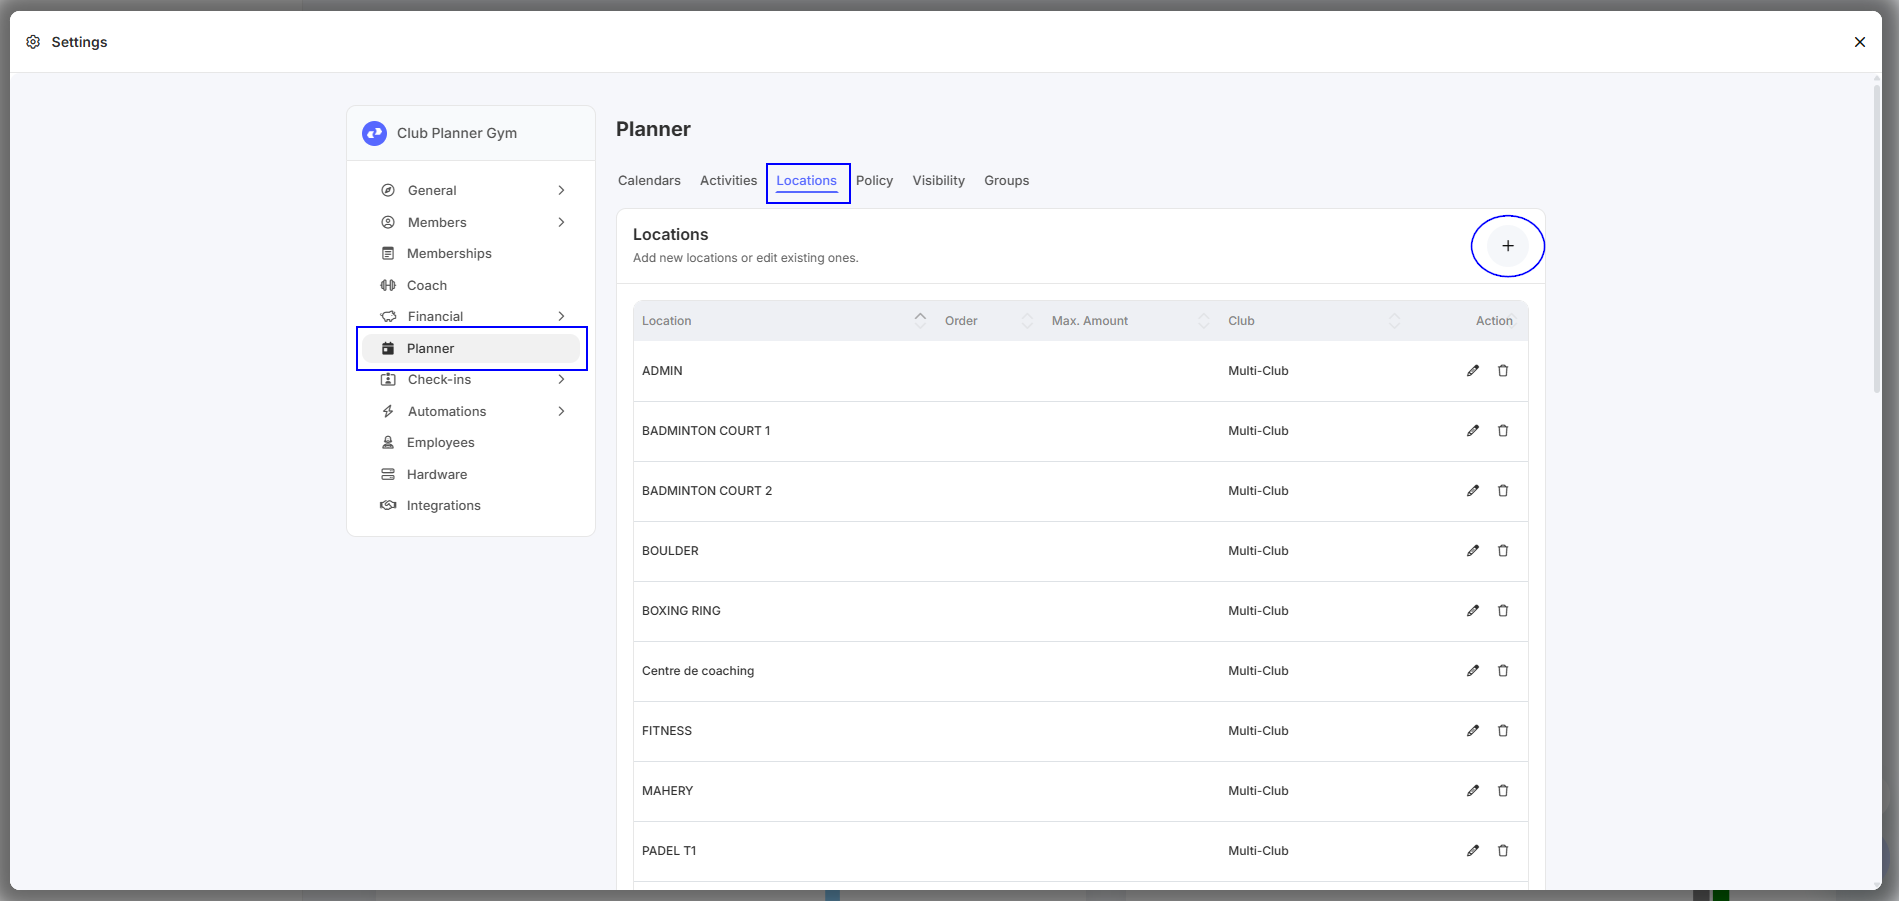
- Gehe zu Einstellungen
- Klicke auf Planner
- Öffne Standorte
- Erstelle hier einen neuen Standort
- Speichere den Standort
2. Den Standort zu einem Kalender hinzufügen
Sobald der Standort erstellt ist, musst du ihn mit dem richtigen Kalender verknüpfen.
Anleitung
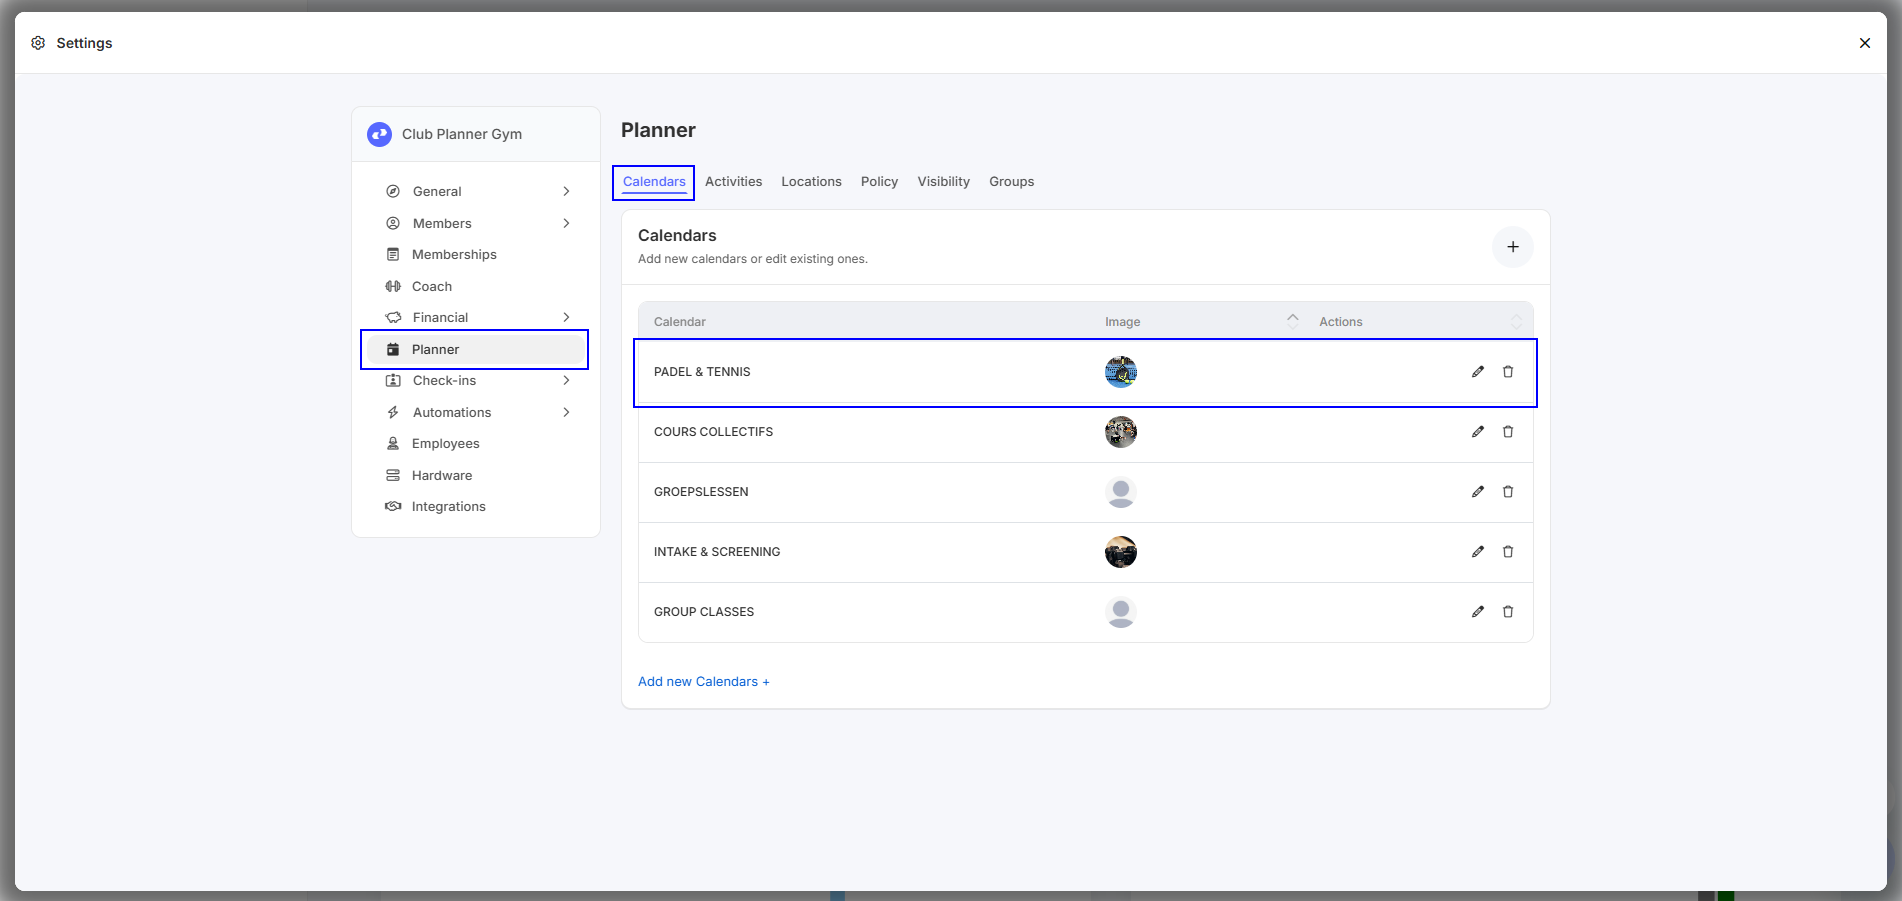
- Gehe zu Einstellungen
- Klicke auf Planner
- Öffne Kalender
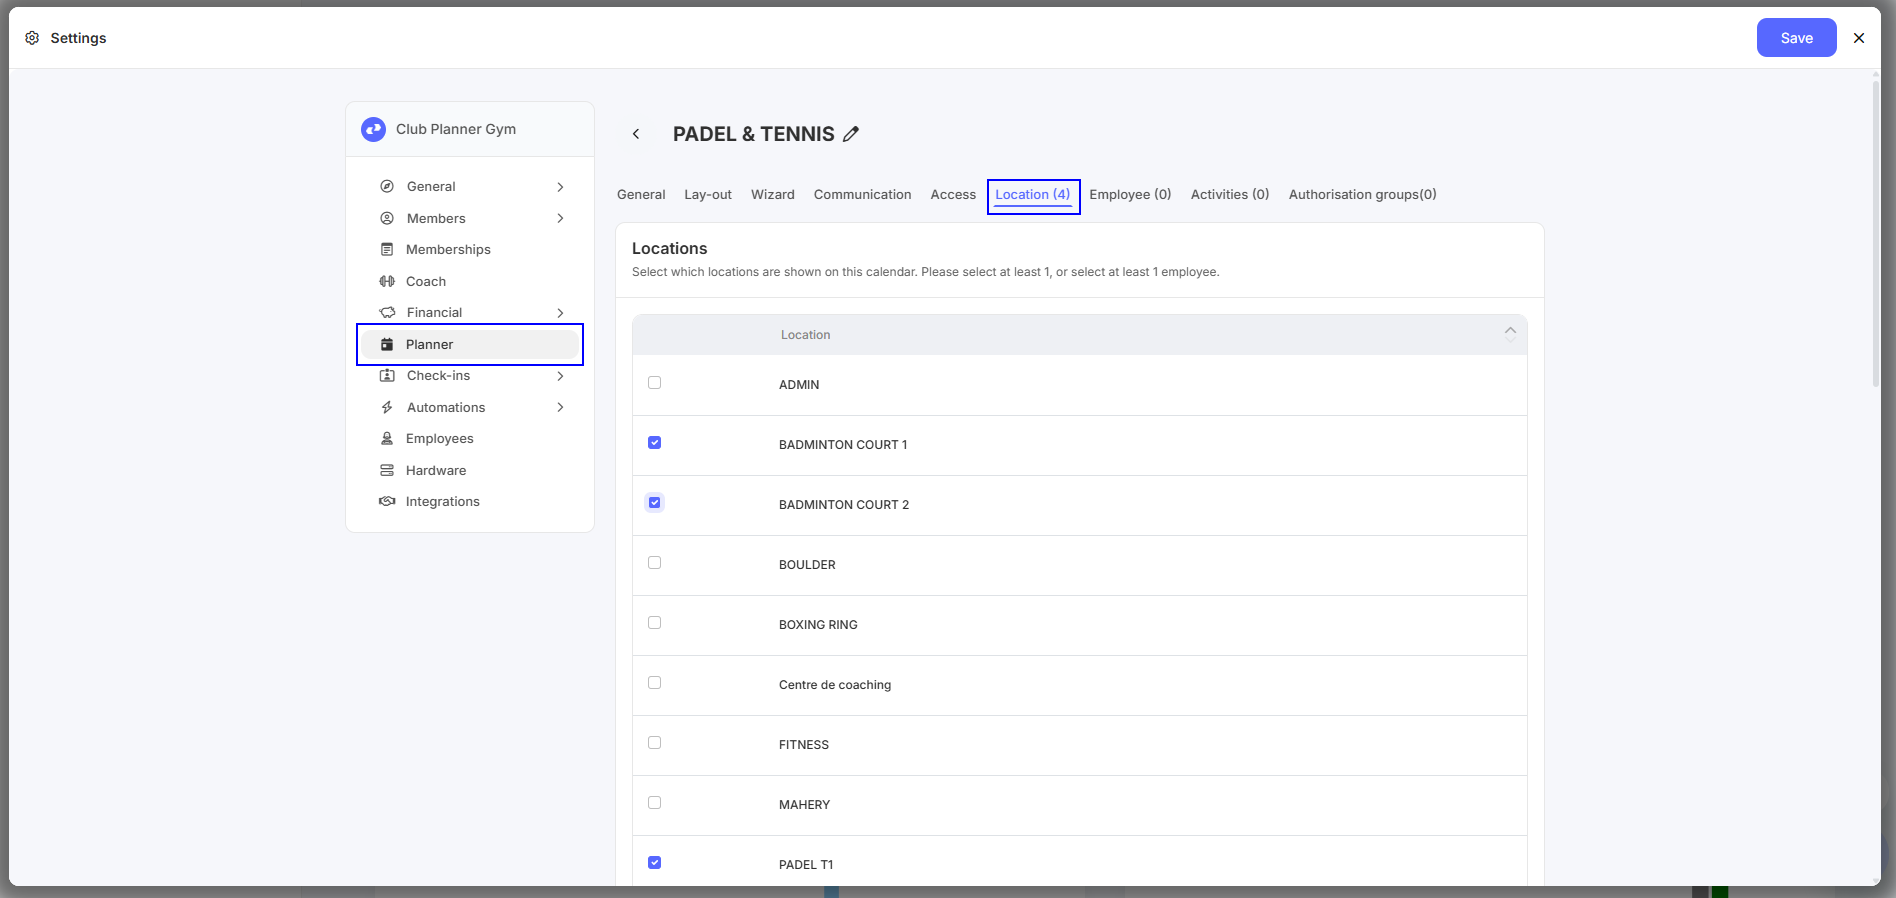
- Öffne den richtigen Kalender
- Gehe zum Reiter Standorte
- Markiere den neuen Standort
- Speichere den Kalender
⚠️ Achtung: Nur Standorte, die mit einem Kalender verknüpft sind, können in der Planung verwendet werden.
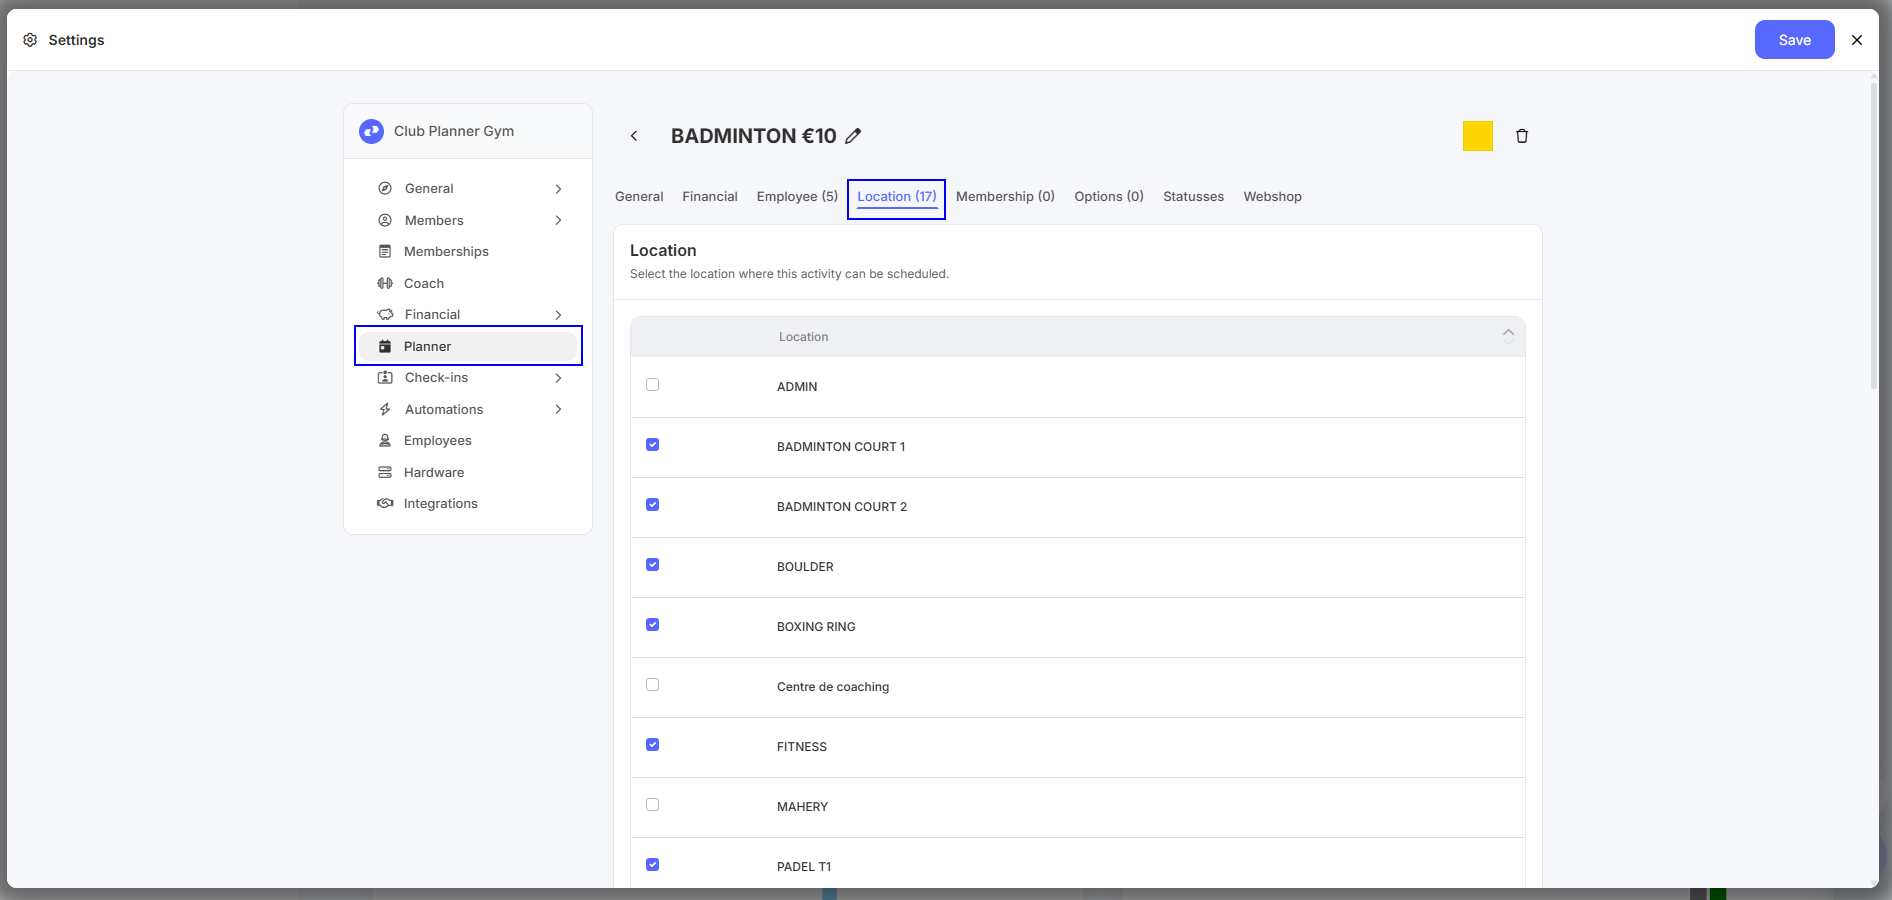
3. Überprüfen, ob Aktivitäten Zugang zum Standort haben
Neben den Kalendereinstellungen ist es auch wichtig zu überprüfen, ob die Aktivitäten, die du einplanen möchtest, Zugang zum Standort haben.
Anleitung
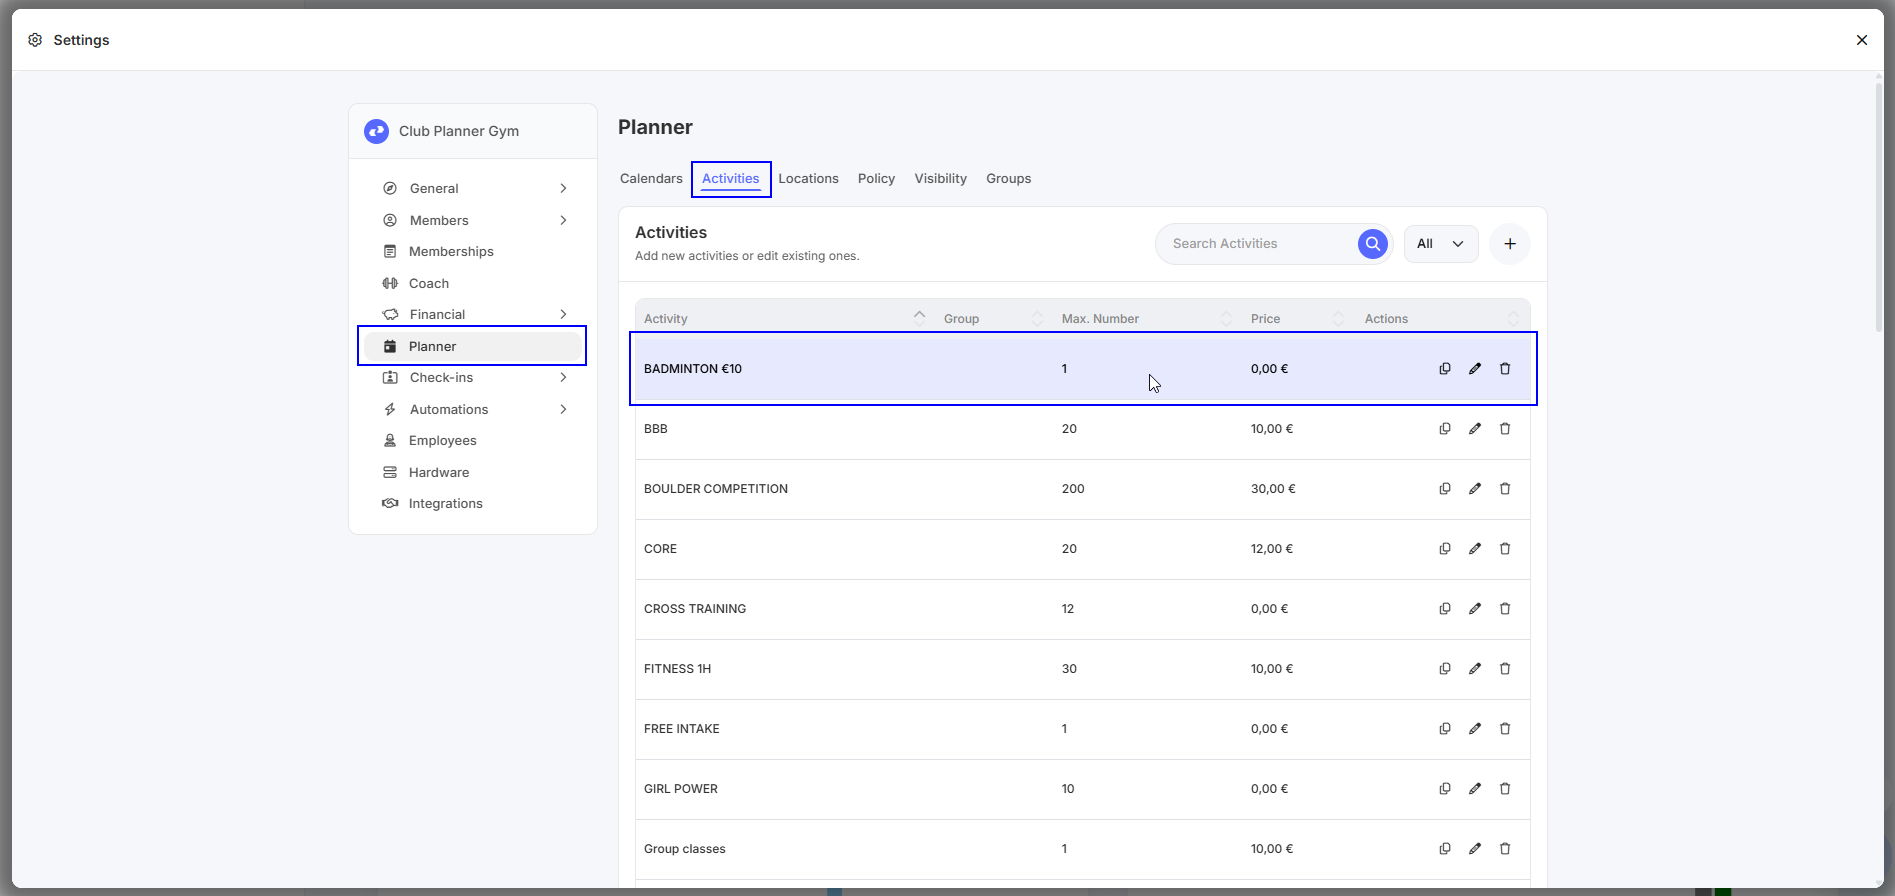
- Gehe zu Einstellungen
- Klicke auf Planner
- Öffne Aktivitäten
- Öffne die Aktivität, die du einplanen möchtest
- Gehe zum Reiter Standorte
- Überprüfe, ob der neue Standort markiert ist
⚠️ Wichtig: Wenn eine Aktivität keinen Zugang zu einem Standort hat, kann diese nicht auf diesem Standort eingeplant werden, auch wenn der Standort zum Kalender hinzugefügt wurde.
4. Zusammenfassung
- ✅ Erstelle zuerst den Standort über Einstellungen → Planner → Standorte
- ✅ Füge den Standort zum richtigen Kalender hinzu
- ✅ Überprüfe pro Aktivität, ob der Standort erlaubt ist
Hast du Fragen oder gelingt es dir nicht, einen Standort korrekt hinzuzufügen? Kontaktiere gerne unser Support-Team.