
Club Planner automatically sends e-mails to your members: welcome mails, booking confirmations, invoices, reminders, cancellations… This article explains where in Club Planner you set which address those mails are sent from and which mail server they go through, screen by screen, field by field.
By default this is already filled in with Club Planner's own mail server. You only need to change these settings if you deliberately want to send through your own mail server.
💡 Looking for the technical side? Which SMTP values your provider uses, and how to set up SPF, DKIM and DMARC in your DNS, is covered in Send emails via Club Planner.
What you need
Ask your e-mail or hosting provider (or your IT contact) for the following:
- SMTP server (outgoing server), for example
smtp.yourprovider.be - Port: usually
587, sometimes465or25 - User name: usually the full e-mail address
- Password for that mailbox
- Whether the server requires a secure connection (SSL/TLS)
For Telenet, Proximus, Gmail, Microsoft 365, Combell, OVH and One.com these values are already listed in Send emails via Club Planner, you only need to copy them across.
Tip: use a dedicated mailbox such as info@yourclub.be or noreply@yourclub.be, not a staff member's personal address. That way your club mails keep working when someone leaves the company or changes their password.
Step 1 — Set your club's sender address
This is the address your members see as the sender, and where their replies arrive.
- Click Settings at the bottom left.
- Go to General › Company information.
- Fill in your club's e-mail address under E-Mail.
- Click Save at the top right.
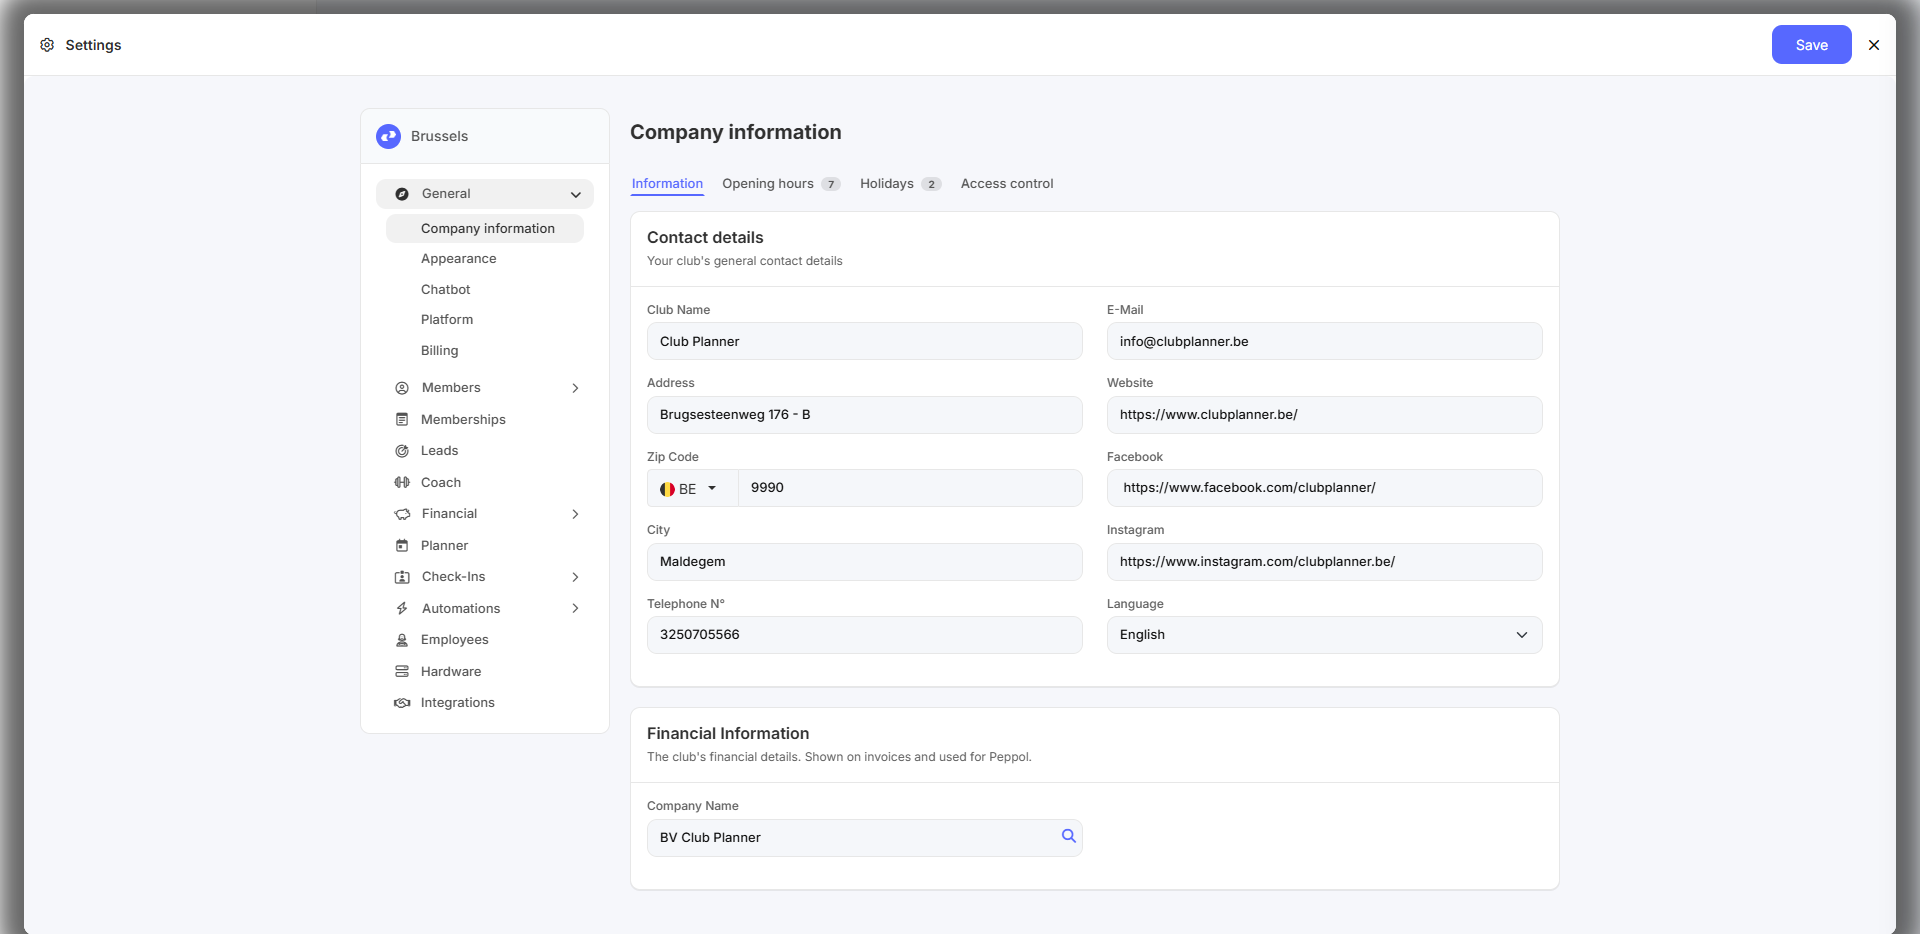
Step 2 — Enter your SMTP details
- Click Settings at the bottom left.
- Go to Automations › E-mail templates.
- Click the Settings tab at the top.
- Fill in the fields (see the table below).
- Click Save at the top right.
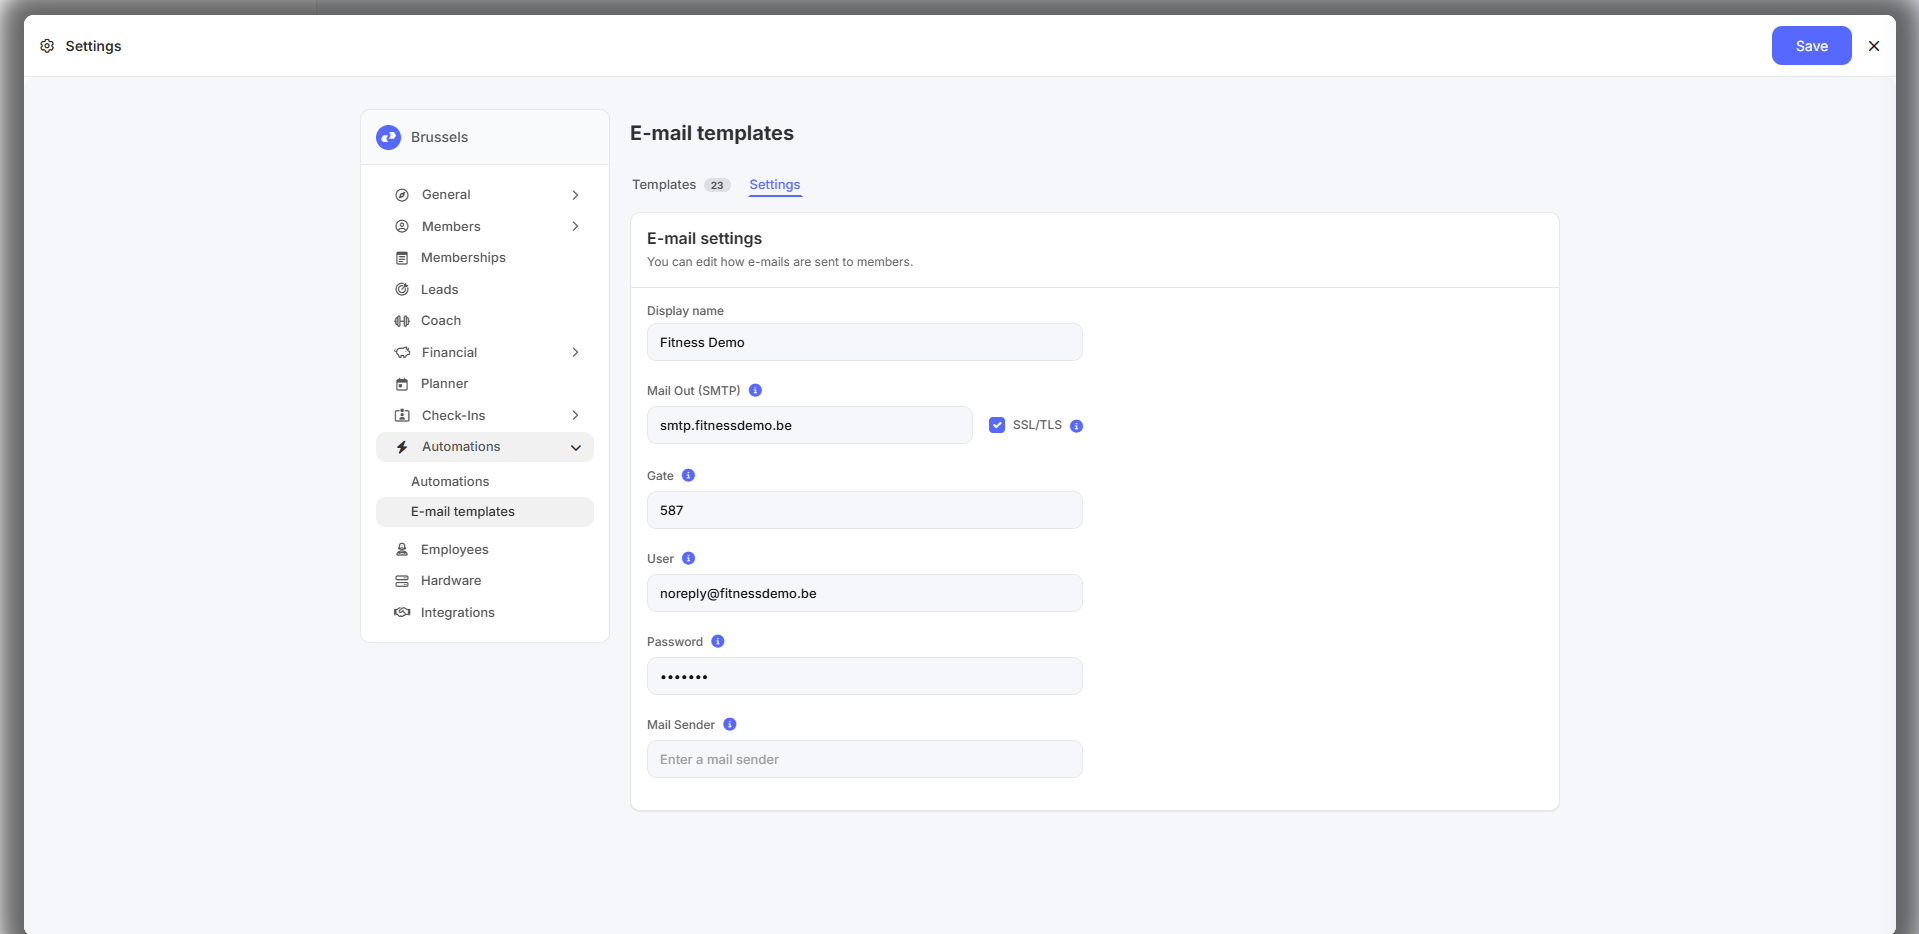
What goes where?
| Field | What to enter |
|---|---|
| Display name | The name the recipient sees next to the e-mail address, e.g. Fitness Demo. Leave it empty and your member only sees the e-mail address. |
| Mail Out (SMTP) | The address of your outgoing mail server, e.g. smtp.fitnessdemo.be. Never leave this field empty — without a mail server no e-mail goes out at all. |
| SSL/TLS | Tick this if your provider requires a secure connection. Nearly every provider does. |
| Gate | The port: 587 for a secure connection (most common), 465 with some providers, 25 for a connection without encryption. |
| User | The login name for your mail server, usually the full e-mail address. |
| Password | The password for that mailbox. |
| Mail Sender | Leave empty in most cases. If you do enter an address here, the mail technically departs from that address, while your members still see your usual club address as the sender and their replies still arrive there. This is only a temporary solution for as long as your domain has no valid SPF record — see Mails ending up in spam? below. |
Working with several clubs?
At the top left you choose which club's settings you are viewing.
- At the overarching level (the multiclub setting) you set the default that applies to all your clubs.
- Want one club to differ? Select that club first and adjust the details there.
Do you see an info icon next to a field? Then this club is still following the multiclub setting. As soon as you change and save that field it becomes club-specific and no longer follows the multiclub setting.
Step 3 — Check that it works
After saving, send an e-mail from Club Planner to your own address, a test mail to a test member for instance, and check:
- Does the mail arrive?
- Does it show the right sender name and address?
- Does it land in the Inbox and not in junk mail?
Nothing arrives? Then check the common problems below.
Common problems
| What you notice | Most likely cause | What to do |
|---|---|---|
| No e-mail goes out at all | The Mail Out (SMTP) field is empty | Fill in the mail server again and save |
| Error when signing in / authentication | Wrong user name or password | Check the details; test them in a mail program first if needed |
| Mails go out slowly or not at all, but the details are correct | Wrong port, or the port is blocked by your network | Try port 587 with SSL/TLS ticked |
| Mails end up in your members' spam folder | Your domain does not authorise the sending server (SPF) | See Mails ending up in spam? below |
| You use Microsoft 365 / Outlook | Microsoft has disabled signing in with a user name and password (basic authentication) on SMTP | This method no longer works. Contact support for the modern connection |
| You use Gmail / Google Workspace with two-step verification | Your normal password is refused | Create an app password at Google and use that here |
Mails ending up in spam?
That usually has nothing to do with the settings on this screen, but with your domain name. If you send with your own address as the sender (e.g. info@yourclub.be), your domain has to explicitly authorise the sending server. Without that, Gmail, Outlook and other providers flag your mail as suspicious.
You arrange that in your domain's DNS settings, not in Club Planner. Your IT or hosting partner will find the full explanation of SPF, DKIM and DMARC here: Send emails via Club Planner.
Is there an address in the Mail Sender field in the meantime? That is the temporary solution keeping your mails out of spam for as long as your SPF record is not in order. If you send via Club Planner's mail server, that field is emptied automatically as soon as your domain has a valid SPF record. If you use your own mail server, that does not happen: clear the field yourself once your SPF record is in order.
Need help?
Still stuck, or using Microsoft 365? Get in touch at support@clubplanner.be and mention which provider you use and which details you have already filled in.
Related articles
- Send emails via Club Planner — the technical side: SMTP values per provider, SPF, DKIM and DMARC
- Managing e-mail templates — the content of your mails, on the Templates tab of this same screen