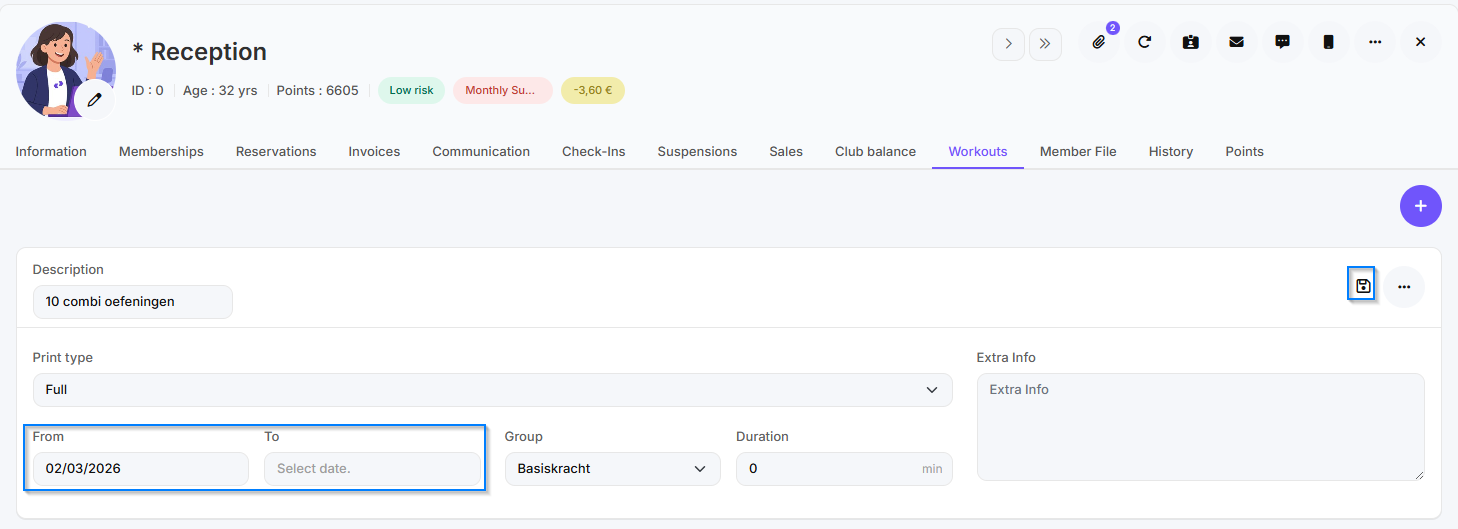
In this manual, you will learn how to easily create a new workout in Club Planner and how to correctly add it to a client.
Create a new workout
Follow the steps below to create a new workout:
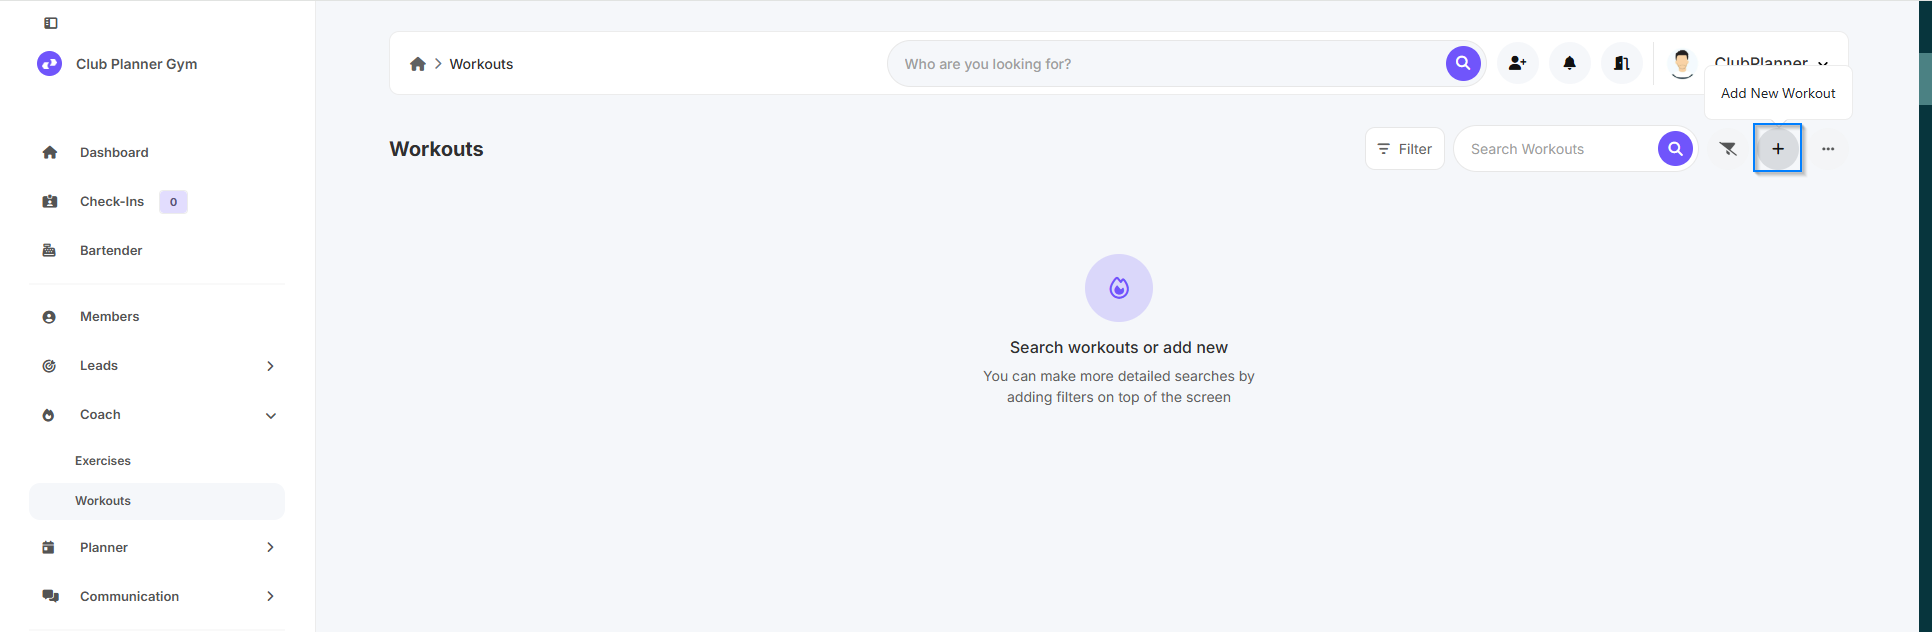
Step 1: Go to Workouts
Go to ‘Coach’
Click on ‘Workouts’
Click on 'Add New Workout' in the top right corner.
Step 2: Fill in the basic information
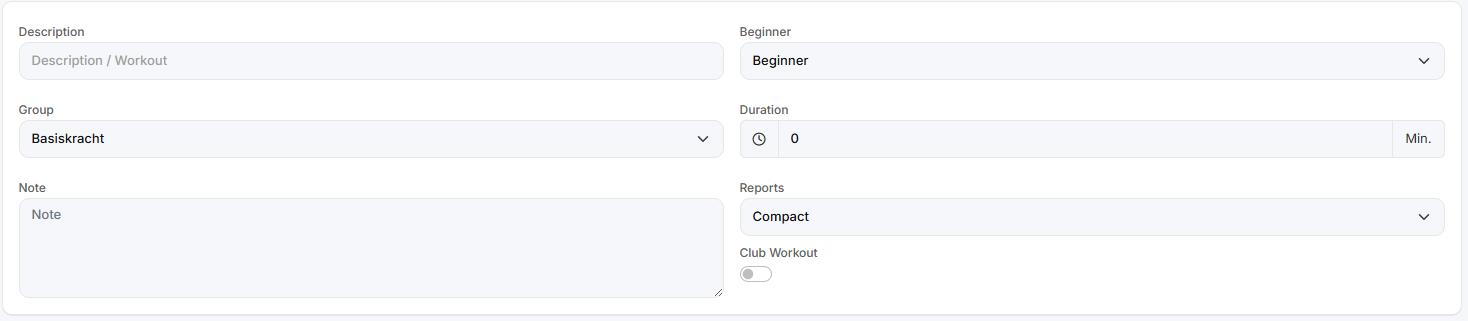
Please enter the following information:
Description
Level
Group
Duration
Note (optional)
Do you want the workout to be visible to all members within the club?
Then check 'Club Workout'.
Step 3: Add exercises
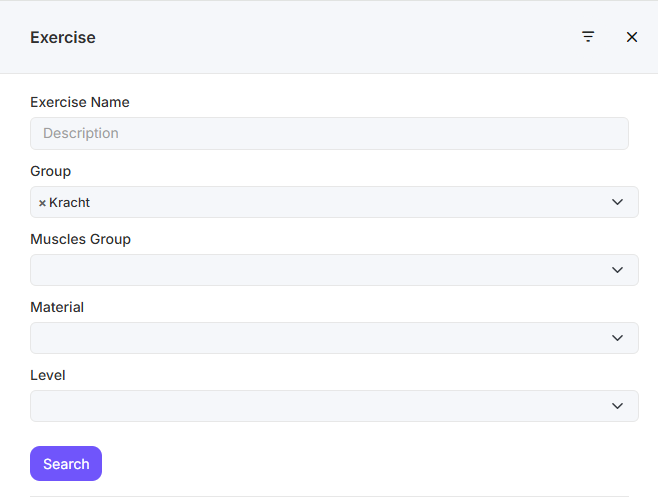
- Click on 'Add Exercise'.
- Use the filters to find the exercises you want.
- Click on the ‘+’ sign next to the exercises you want to add.
Step 4: Set up sets and details
For each exercise, you can:
- Add the number of sets
- Enter additional information or comments
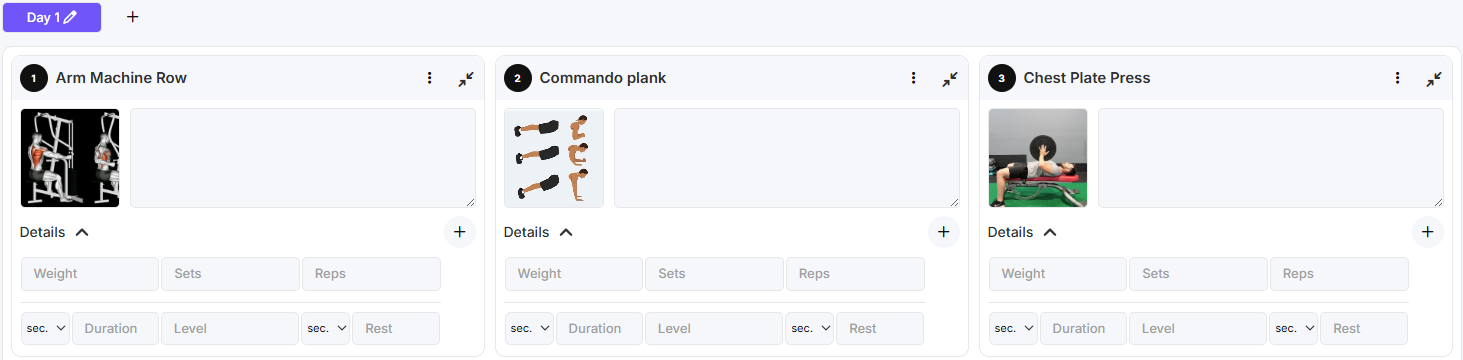
Step 5: Add an extra day (optional)
Would you like to have multiple days in the same workout?
- Click on the ‘+’ sign next to ‘Day 1’.
Add ‘Dag 2’.
Add exercises for this day again
You can repeat this for several days.
Step 6: Save
Is the workout completely finished?
Click on 'Save' at the top.
Add a workout to a client
Want to link an existing workout to a member? Follow these steps:
Step 1: Go to the member file
Go to ‘Members’
- Find the desired member
Open the member file
Step 2: Go to the Workouts tab
- In the member file, click on the 'Workouts' tab.
Click on ‘Add new’

Step 3: Select a template
Choose ‘Use template’
- Find the workout you created earlier
- Click on the ‘+’ sign
Step 4: Set validity period
- Set how long the workout should be visible to the member
Step 5: Save
Click on ‘Save’