
In this article, we explain step by step how to send an email or newsletter to (a selection of) your members via Club Planner.
We start from the existing newsletter template that is already available in the database.
1. Copying and editing the newsletter template
In Club Planner, a newsletter email template is provided by default. We recommend copying this template and adapting it to your own message.
Step-by-step
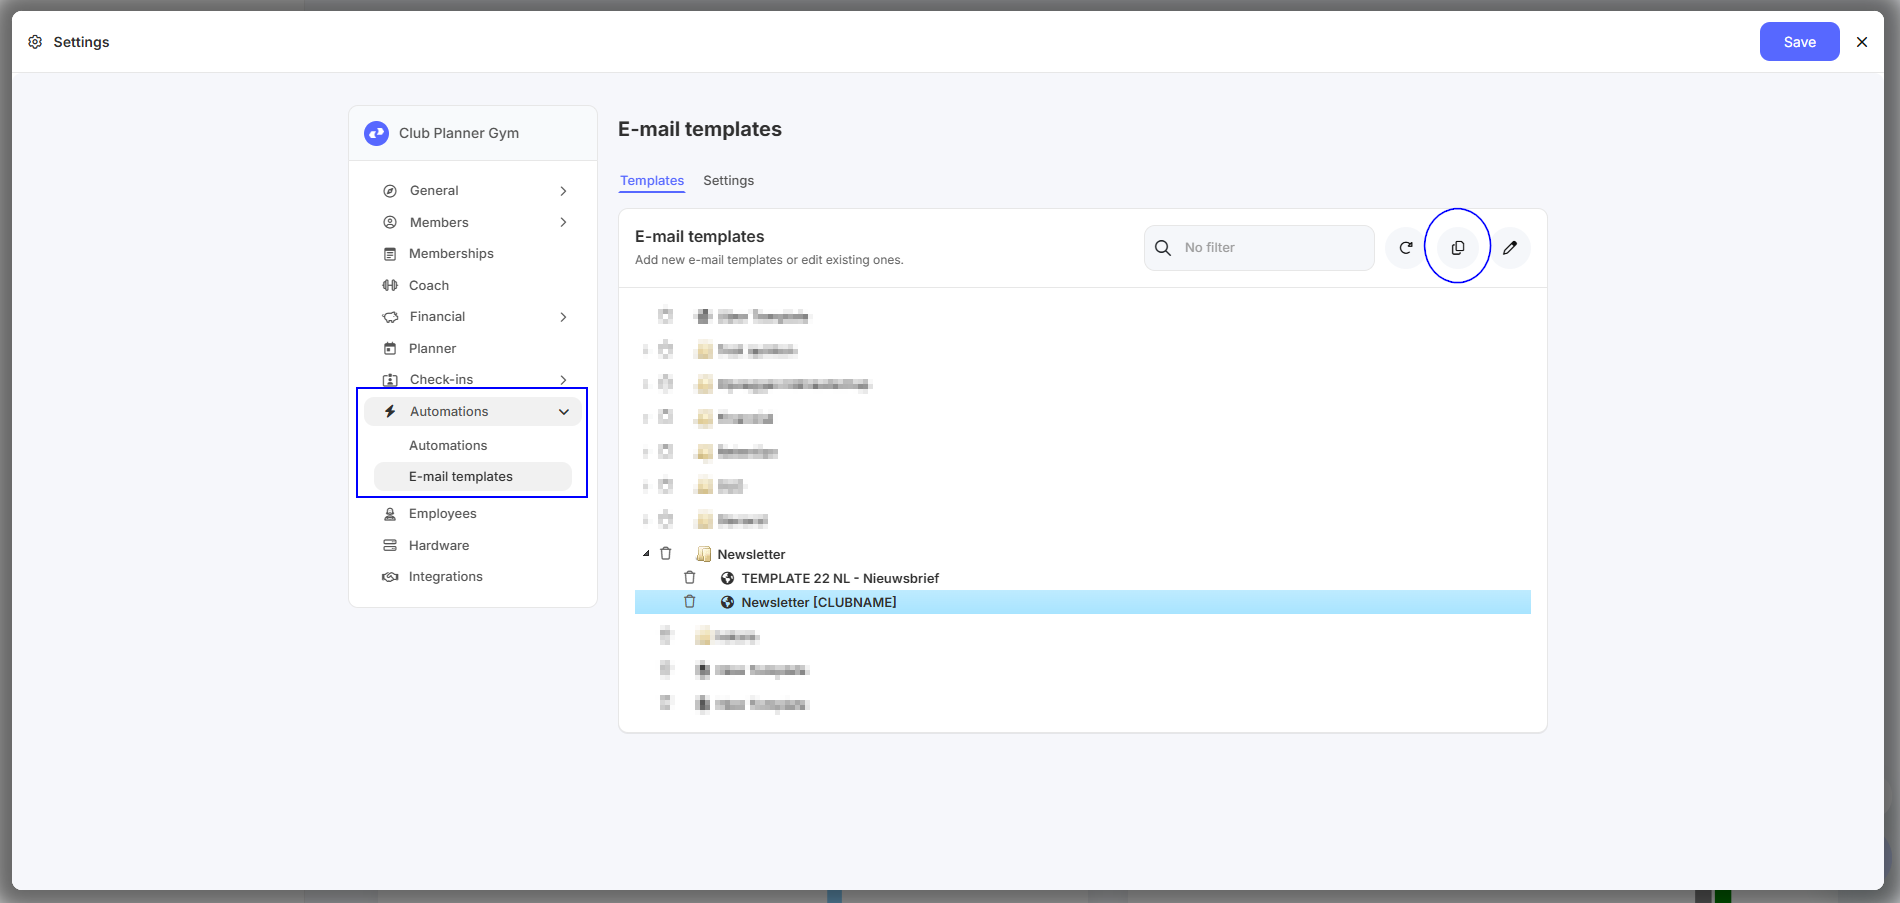
Go to Settings
Click on Automations
Open Email templates
Find the newsletter template
Make a copy of this template
- Enter a description and click ‘Copy’.
- Open the renamed 'Newsletter'
Edit the content (title, text, layout, …)
💡 Tip: Always work with a copy, so the original template remains available for future use.
2. Selecting recipients (member list)
Once your email template is ready, you can decide which members should receive the email.
Searching for members
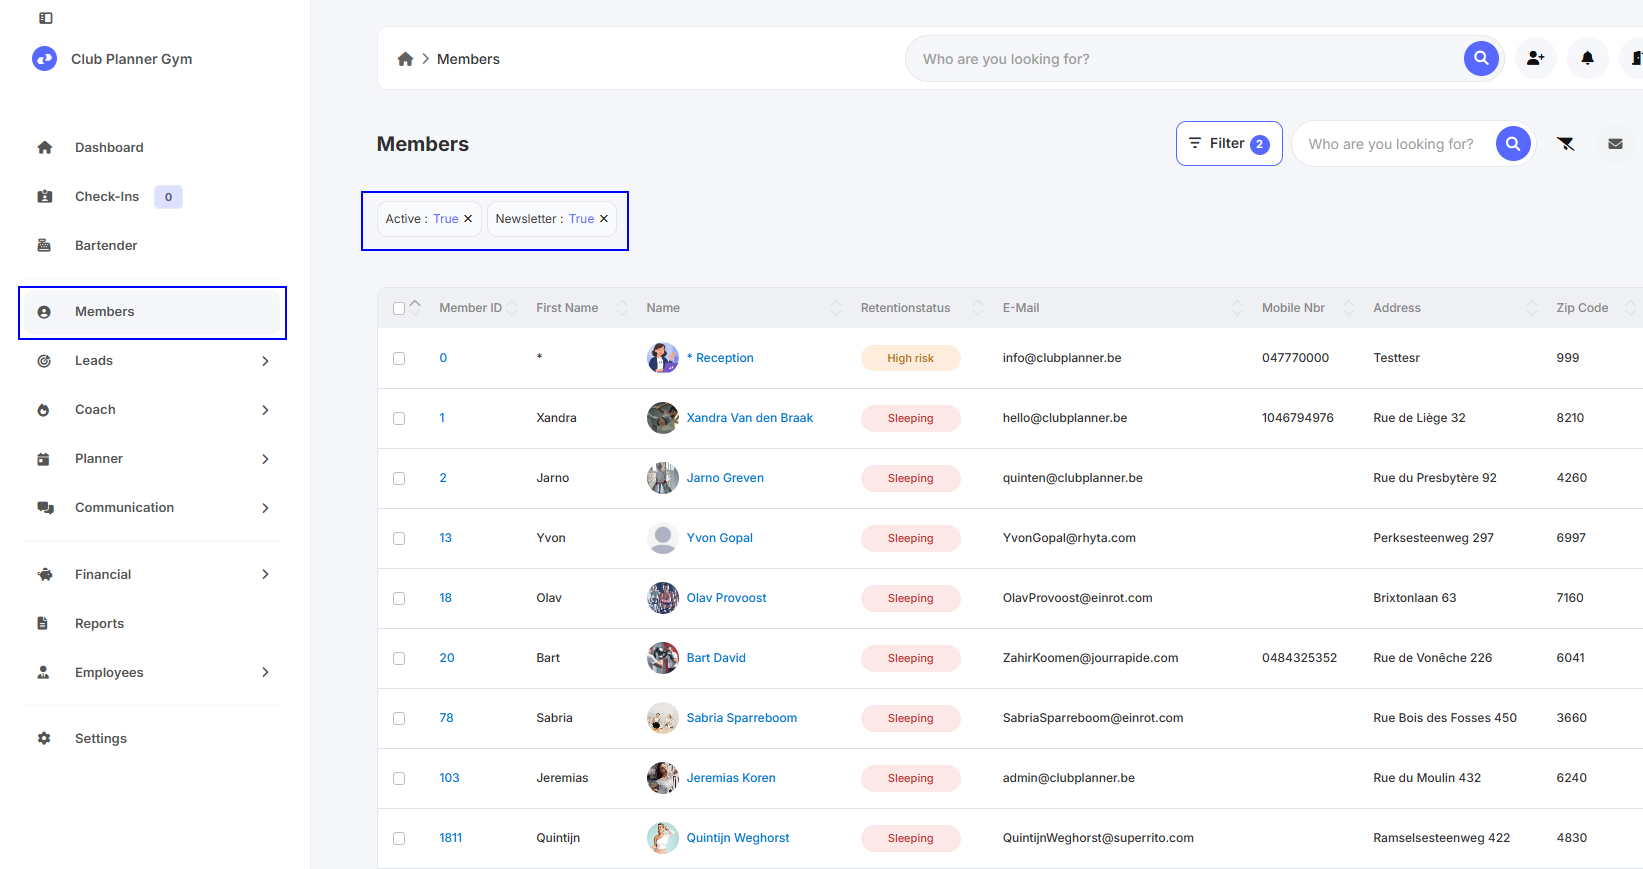
Go to Members
Use the available filters to create your desired target group
Examples of filters:
(In)active members
Only members for whom “newsletter” is enabled
…
⚠️ Attention: The email will be sent to all members visible in the list after applying the filters.
3. Sending the email to the selected members
Once you have the correct member list:
Select all members in the list
Click on the mail icon ✉️ in the top right corner
At the bottom, select the favorite (email template) you just created
Check the content
Send the email
4. Important points of attention
📬 Always double-check that you have selected the correct members
✏️ Carefully review the email content before sending
🧪 If needed, first test with a small test group or send it to yourself
5. Summary
✅ Copy the existing newsletter template
✅ Adapt the content to your own message
✅ Select the correct members using filters
✅ Use the mail icon to send the email
If you have any questions or if sending fails, feel free to contact our support.